Baby chicks are so cute! These days, many families are choosing to raise chickens in their backyards. If you are homesteading or starting your tiny backyard farm, raising chicks is something you might need to know about. You may already have egg-laying chickens or maybe planning to get baby chicks for the first time. But do you know how to care for baby chicks?
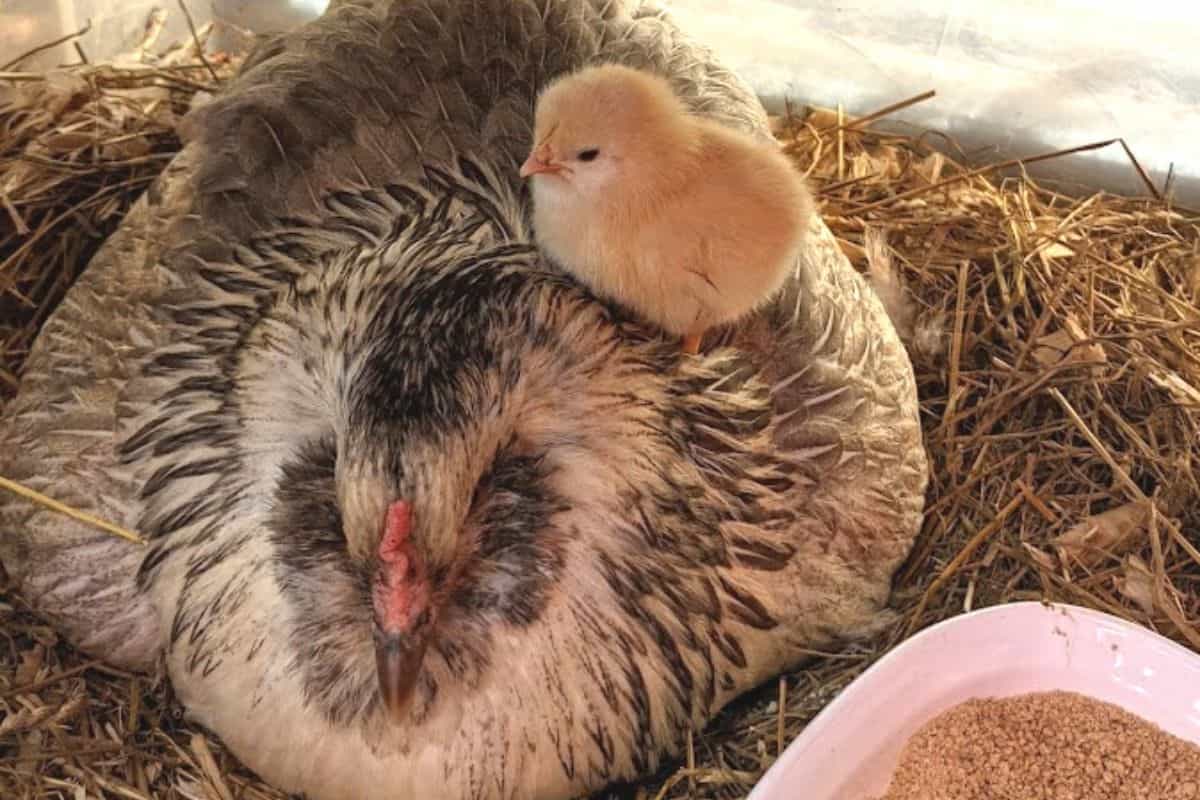
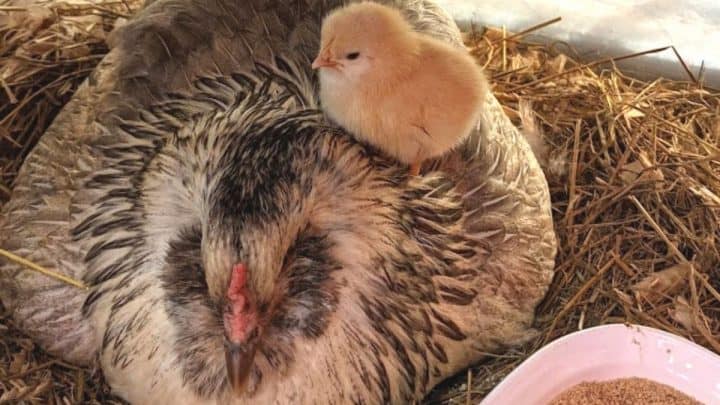
Ollie, our Easter egger, and her first baby chick, Daisy
How To Care For Baby Chicks – Quick Answer
Raising baby chicks doesn’t have to be hard. Make sure they have starter feed and clean water available, a source of heat, and a safe place to take cover. Of course, that’s just the basics. Each day as your babies grow you’ll have more questions:
- are they eating enough?
- can I feed them food scraps (the list is long here, as you think of things you can give your baby chicks)?
- should I give them treats?
- when can I let them go outside?
- are they ready to sleep in the coop?
- why is one of my chicks lethargic?
- what is pasty butt?
- etc.
Learn more about raising chickens
No worries! We are here to guide you through each step and answer many of your questions. Let us begin with where and how to get baby chicks and answer some of your questions regarding raising chickens. keep reading 🙂
How To Get Chickens?
There are three ways to get baby chicks:
- let a broody hen hatch them
- you hatch them in a brooder
- buy them already hatched
You can get chickens from a local farm supply or have them delivered to your doorstep, buy them at various stages of development, buy day-old chicks, or ready-to-lay pullets.
With day-old chicks, you would need to wait about 6 months to get eggs, while ready-to-lay pullets provide eggs sooner. You can buy day-old chickens from a local hatchery or get them delivered to your doorstep or the nearest post office.
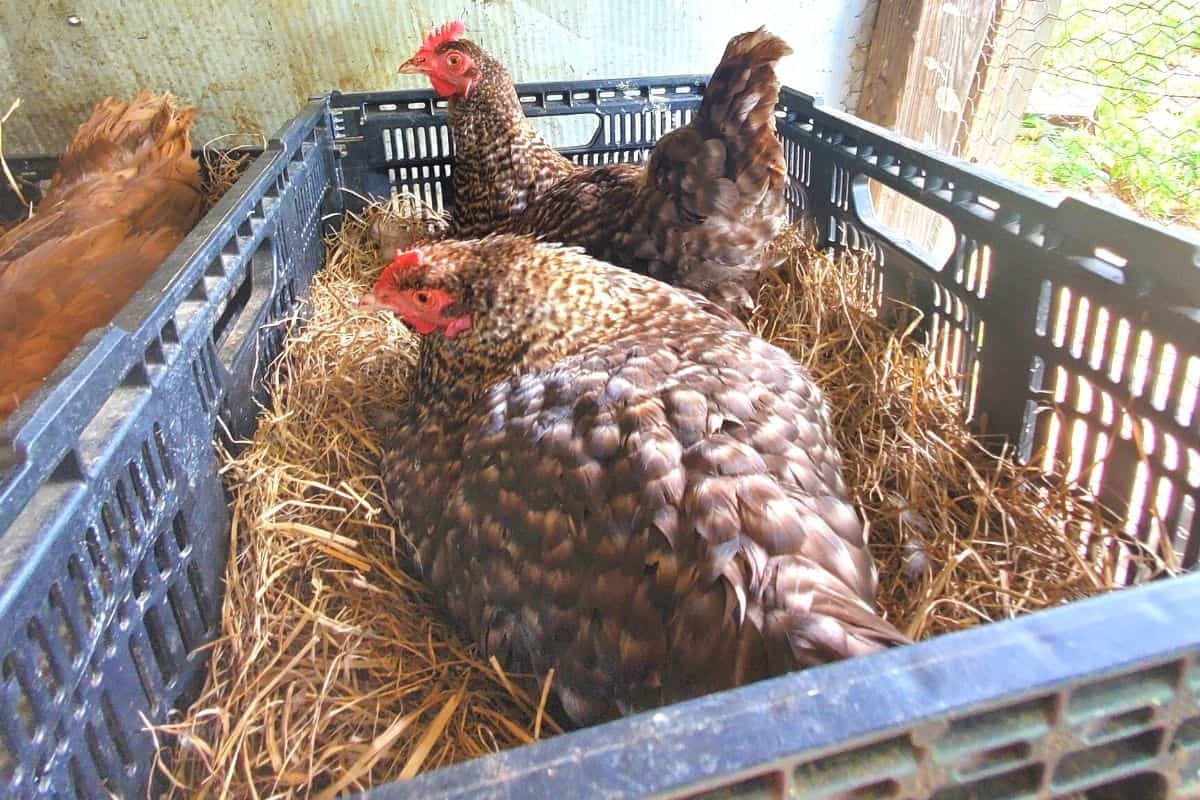
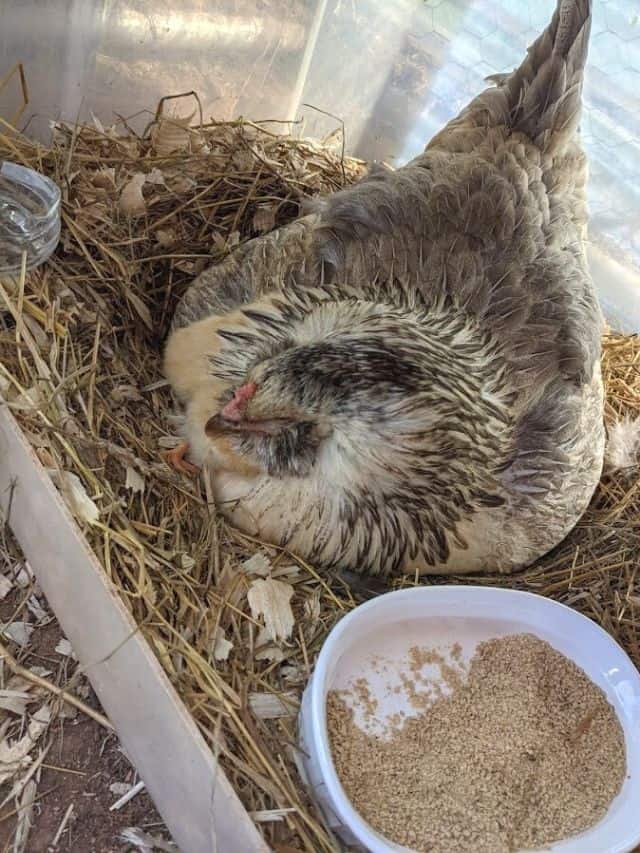
Hatching chicks
If you already have a flock of chickens, you can hatch your chicks with a broody hen. It is the best option to hatch new chicks as the broody hen does all the work for you.
Broodiness is the instinct to sit on the eggs until they hatch. Silkies, Brahmas, Orpingtons, and Cochins are some popular broody breeds. You will need a rooster to get fertilized eggs that the broody hen can hatch.
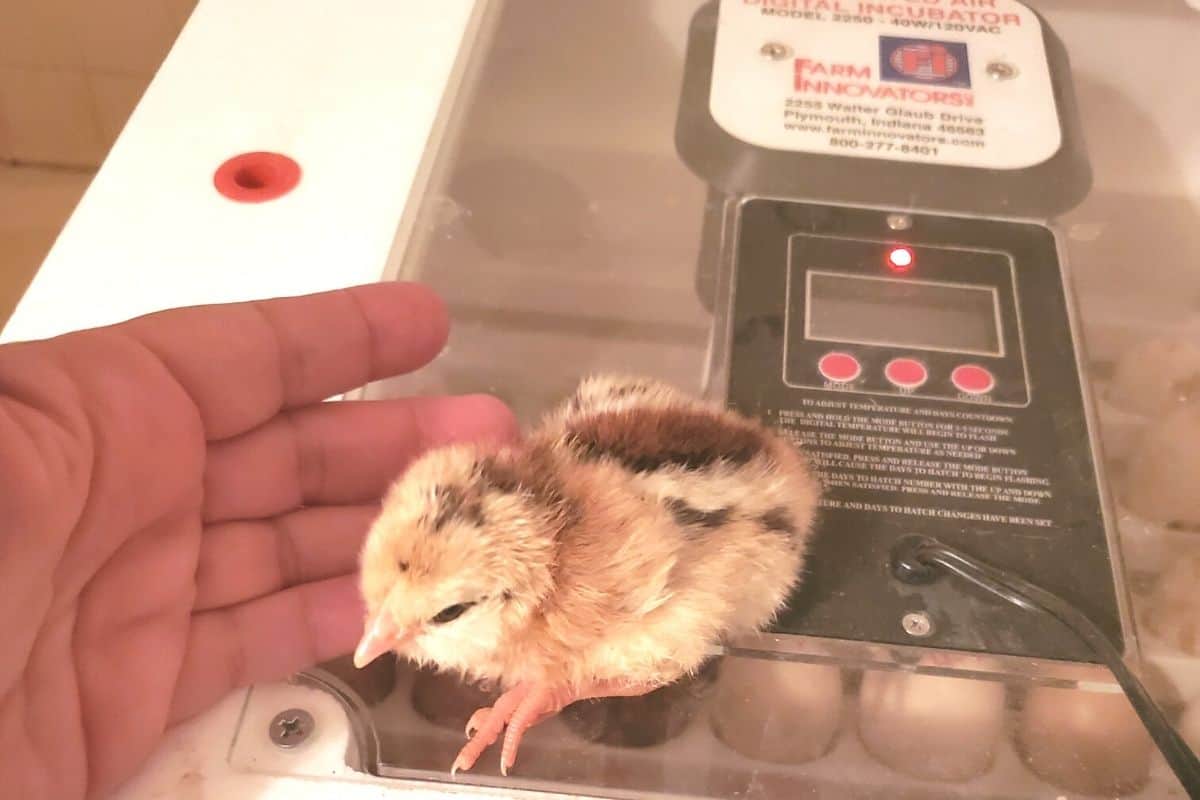
Another way to hatch the fertile eggs is using a home incubator. You will need to monitor the incubator throughout the 21 days as the chicks left for too long will die.
How do you identify a broody hen?
If you notice any of these things, you might have a broody hen on your hands:
- a broody hen will prefer a dark, private, and comfortable location
- she will become aggressive and peck at intruders to defend her eggs
- you’ll see her leave her nest only once or twice a day to eat, drink and poop
One concern about broody hens is that not all are dedicated hatching hens. Some may abandon the eggs after a couple of days or even kill the chicks after hatching. Look at her past performances to be sure before investing in expensive hatching eggs. Learn more about broody hens.
Shelter and diet during hatching
We set out broody in a plastic box in the run, so she could still be part of the flock and not get estranged
You have recognized the broody hen, and have fertile eggs. Now you may be concerned about her shelter for hatching. You may let her brood in the box or shift her to a separate area.
Brooding in the box will be less stressful for her since she chose the location herself. It will also allow her to interact with the flock. However, it may lead to a situation where other hens may lay eggs under her. In that case, you will need to remove the new eggs each day and put them under another broody hen or in an incubator.
If you are thinking of separating the broody hen from the flock for the safety of the hatching eggs, be very careful with that because moving her may break her brooding instinct. Before taking her to the new shelter, have it ready for her, and the eggs. Make sure she does not have to go far in search of food during the hatching period. Provide food and water near the shelter for easy access.
Move her at night and be careful while collecting her eggs as she may peck and bite you. Also, keep her in a place that is visible to the flock. The flock will not forget her and will easily accept her with the new chicks later on.
Once everything is settled, wait for about 21 days for the new baby chicks to hatch.
Baby chickens hatched by a broody hen are pretty much hands-free, as the momma will teach them everything and will take really good care of them. She’ll teach them:
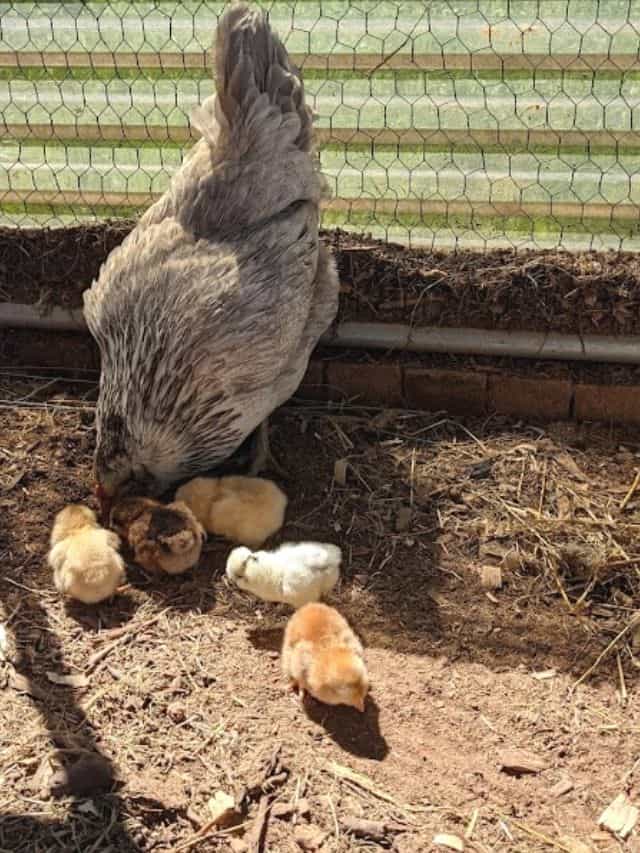
Ollie showing her babies how to scratch
- how and where to scratch
- how to take a bath
- once they are about a week old, she’ll teach them how to roost
She’ll also protect them from cold (they just disappear under mommy’s wings/feathers/booty when they need to warm up), and keep them safe from pecking by other chickens in the flock.
Hatching with an incubator
If you are hatching eggs with an incubator, try to get one with automatic features like egg turning and a fan for even heat distribution.
Prepare your incubator about a week before. Clean it properly with a bleach solution, and rinse thoroughly to ensure a sanitized environment for the eggs. Once you have cleaned and dried the incubator, test it for constant temperature and humidity levels.
Once everything is set up, your incubator is ready to hatch eggs. Put a minimum of 6 eggs per batch for better hatching results. The incubator temperature should be 100.5 degrees Fahrenheit and maintain a humidity level of 50-55%.
Once the incubation has started, you will need to monitor the eggs periodically. When the eggs have been in the incubator for about a week, you can examine them for proper growth of the embryo.
Between 7 to 10 days, you can practice candling the eggs. You can take them out of the incubator for no more than 5 to 10 minutes. You can use a small flashlight or a special candling light. Candle a few at a time, so it does not disturb incubation. Expect the following results and work accordingly.
- clear egg – when an egg is clear inside, or there is no visible structure, either the egg is not fertile or the embryo died at an early stage
- red ring – if you see a red ring within the egg, the embryo has died
- blood vessels – if blood vessels are visible within the egg, it confirms a live embryo
For the first two observations, you will need to remove the eggs from the incubator. Maintain the eggs that show the presence of blood vessels. You will need to remove broken or leaking eggs to prevent contamination of the incubator.
Turning of eggs
A developing chick may get squeezed between the yolk and the shell or may stick to the shell. To prevent this, rotate or turn the eggs at least 3 times a day from day 1 to day 18.
Wash your hands or wear clean gloves. It is important that you do not transfer germs or skin oils to the developing chick. By day 18, the chick is preparing to hatch. It will position itself for hatching, and you should not rotate the eggs anymore. Maintain the same 100.5 degrees Fahrenheit temperature, but increase the humidity level to 70%.
The hatching
Day 21 is full of excitement as you are expecting your young chicks. If you do not observe any hatching on the 21st day, give it some more time. Do not take the hatched chicks out of the incubator right away. The peeping of the hatched chicks encourages the remaining chicks to break the shell. After day 23, candle unhatched eggs to examine before discarding.
When you have your chicks hatched, lower the temperature to 95 degrees Fahrenheit. You can move the chicks to the brooder once they have all dried. Have the brooder ready for the chicks with food and water.
If you think incubating at home will not work for you, do not be worried as you can easily buy day-old chicks both online and in stores. You should know how to care for baby chicks.
Chick care after hatching
Newly hatched chicks require your attention for proper growth. You need to:
- keep them dry, warm, and safe
- give them easy access to clean, fresh water
- keep them clean and well-fed.
To make sure you do not make any mistakes raising the chicks, refer to the section below.
What To Do After Chickens Hatch In Incubator
After hatching, your chicks will be damp. Do not take them out of the incubator until they have dried. If you do, they will catch a chill. However, you may adjust the incubator temperature to 95 degrees Fahrenheit to help the chicks feel comfortable.
Hatching is a very exhausting process for chicks. So, do not worry if your chicks appear a little tired of the process. Let them rest.
Do chickens eat right after hatching?
Baby chicks absorb the yolk into their body before hatching. It provides them with many valuable nutrients. Hence, it is not necessary to feed them for the next 24 to 48 hours after hatching.
However, baby chicks should have some water within 24 hours or the first day of hatching.
These baby chickens may not know how to drink. Normally, the mother hen teaches the babies how to drink water. If you are hatching eggs with a broody hen, make sure there is a water source nearby.
If you hatch them in an incubator, you will need to teach them. Put a baby chicken waterer in the incubator for the chicks. Check after a few hours to see if they consumed water or not. If your chicks are not drinking water on their own, gently dip their beak into the water. If they do not get it at once, be patient and gentle for a few more attempts until they learn to drink.
Is it safe to keep baby chicks in the house?
If you are raising chicks for the first time without a mother hen, raise them indoors as they will need a heat lamp to stay warm. You will also need to make sure that the chicks are eating and drinking water. Keeping them indoors makes the job easy for you. When you are raising chicks inside, you need to have the following supplies:
- heat source: could be a heat plate or a heat lamp (these can be a fire hazard, so keep an eye out if you decide to use one)
- paper towels
- animal bedding
- chick feeder and waterer (this set on Amazon is very popular)
- chick starter food
What should I keep baby chicks in?
Once all babies have hatched and dried, move them from the incubator to a brooder box. You may use a clean cardboard box or a plastic container for the purpose. Line the box with newspaper and hay. Above that, line paper towels and wood shavings. It makes the cleaning process easy for you and the chicks have good traction under the feet. It helps prevent any balance issues or other developmental problems.
Before you move the chicks into the brooder, prepare it with a waterer and food source, and a heat lamp.
A red heat plate can be set to about 92 degrees Fahrenheit. Baby chicks need a heat source to stay warm and healthy. Otherwise, they will catch a chill and die. You do not want to lose the chicks that you have cared so much for. Be careful and follow proper instructions to raise them into healthy egg layers or broody hens. Many chicks may be born as roosters, but you will not know for several weeks.
Baby chick brooder

A comfortable brooder is important for the well-being of your newly hatched baby chicks. While you can make a brooder from any of your garage materials, the basic thing to keep in mind before making a brooder is size. Each chick needs a minimum of 1 square foot of space. Again, it should be big enough to hold a chick waterer and feeding station.
The brooder needs to be at least 12 inches tall for the first one to three weeks. When the chicks are about six weeks old, increase the height to 24 inches. Otherwise, they may hop out of the box. If you have pets or other creatures that may harm your baby chicks, use a breathable lid to prevent any accident. Hardware cloth is a good option.
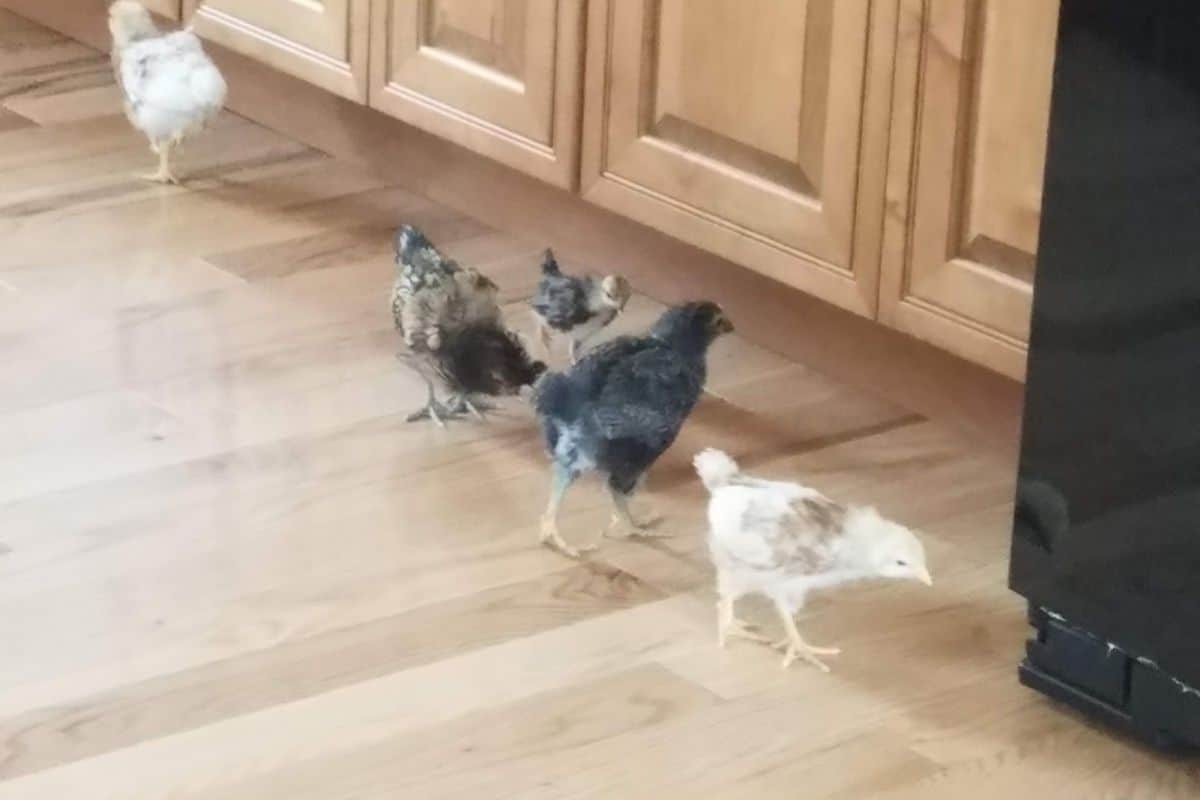
We woke up one morning to find all our baby chicks out of their brooder and inspecting our kitchen floor
What to feed baby chicks
After they are out of the incubator into the brooder, your chicks are ready to have their first meal. Serve these little guests chick starter feed. Baby chickens do not need chick grit.
Also, make sure they always drink water before they start eating. Sticky bottoms will cause them fewer problems when they have a good quantity of water intake. Water plays an essential role in a baby chick’s health and wellbeing.
If you have a mother hen to raise the chicks for you, you can feed her chick starter along with the chicks. Because she is busy raising the chicks, she will not lay eggs for a few weeks, which reduces the requirement of calcium-rich layer ratio for her. However, after 4 to 6 weeks, start feeding her layer ration as she will go back laying eggs soon.
Make sure you do not serve layer ration to the chicks. The high calcium content can damage the kidneys of baby chicks.
In case you run out of chick starter meals, you can simply make your own. Hard boil some eggs, mash, and mix them with oatmeal. Your homemade chick starter is ready for serving. You may also feed the chicks some protein-rich worms from the backyard.
Another emergency starter ration is cracked scratch grains and uncooked oatmeal in a 50/50 proportion. Run it through the blender and it is ready to feed to the chicks. However, do not serve it daily. Keep it only as an emergency option. Chick starter is the best nutritious meal for baby chickens for healthy growth.
How long should chicks be on the starter feed?
Your baby chicks need to be on the starter feed for about 8 weeks. During this time they should gain most of their adult weight. You can purchase commercially available chick starter meals from most farm supply stores without much difficulty.
These little chicks eat and drink water throughout the day. So, do not keep the feeder empty for too long. Also, do not fill the chick feeder before it is empty. Clean the feeder at least once per week.
Baby chick waterer
 Automatic Fill Chick Cup Drinker Waterer")
Chickens drink almost double the amount they eat. Serving them clean, fresh water is crucial to their overall health and wellbeing. Always serve water in the baby chick waterer so that the chicks do not spill the water.
Be sure of the waterer size as you do not want your baby chick to fall in. Use a quart canning jar with a metal watering base you can purchase from any local feed store. This way the chicks will spill less and drink more.
You may spike warm water with a tablespoon of apple cider vinegar per gallon a few times a week. It encourages the growth of beneficial bacteria and yeasts that colonize a chick’s intestine. It fends off harmful organisms through a process named competitive exclusion.
The growth of beneficial gut flora is slower when chicks are raised in an incubator. Hence baby chick probiotics are necessary to enhance their immunity. These probiotics are sprinkled on feed or dissolved in water. It gives the chicks an early dose of the gut flora that will eventually colonize their intestine.
How do I know if my baby chicks are warm enough?
Baby chicks need a warm environment for proper growth. But you want to be sure they are not getting too much heat. Installing a thermometer in the brooder is a good way to monitor the temperature. You can set the temperature to a point that is just perfect for these little creatures.
If you see the chicks huddling together in the heat lamp’s beam, you may raise the temperature by a few degrees or bring the lamp closer to the brooder to keep them warmer.
On the other hand, if the chicks are moving away from the beam to sleep, they are getting much more heat than they need. Reduce the temperature or raise the lamp to make the chicks comfortable.
You should be immediately concerned if your chicks are panting. Reduce the temperature by several degrees quickly as they are overheated at this point.
Your brooder needs to have warmer and cooler areas. There are heat lamp alternatives such as chick brooder heating plates that are safer than a heat lamp and address hot spots over a small area. Be cautious while buying these as poor quality plates may harm your chicks. Even if you are using these, monitor the temperature and the chicks’ response for better results.
How long do you have to keep chicks under a heat lamp?
Baby chicks need a heat lamp until they are about 6 weeks of age. However, the temperature of the brooder lamp needs to be reduced at a weekly interval. First, the temperature needs to be about 92-95 degrees Fahrenheit. Once the birds have grown feathers, drop the temperature by 5 degrees per week until six weeks.
Follow the chart below and maintain the brooder temperature week-wise to grow your baby chicks into healthy egg layers or broody hens. Depending on your chicks’ response to the temperature, you may need to change it for their better comfort.
| Chick Age | Temperature | Considerations |
| 0-7 Days | 95° | Do not take babies out of the brooder for more than a couple of minutes. |
| Week 2 | 90°F | Babies may try to start flying very early! Make sure the heat lamp cannot be reached by the chicks. |
| Week 3 | 85°F | If the weather is nice and warm, you may allow the chicks to make small trips outside. |
| Week 4 | 80°F | The chicks are ready for most outdoor activities but do not let them out of your sight. |
| Week 5 | 75°F | If your room temperature is about 75 degrees Fahrenheit, turn off the heat lamp. Otherwise, keep it on for a couple of more weeks. |
| Week 6 | 70°F | Let them spend their time in your backyard pecking and roaming. Keep them indoors on rainy days. |
| After 6 Weeks | Ready for outdoors | Shift them into the coops in your backyard. |
How do you keep baby chicks warm without a heat lamp?
While traditional heat lamps are an easy solution to keep your chicks warm, they do come with cons. If the chicks hit the lamp in an attempt to fly, they will be injured or die. Also, it may consume a lot of electricity, increasing your monthly energy bill. So if you are looking for alternative heating solutions, there are plenty of DIY solutions to fulfil the heat requirement of your little chicks.
Line the box with mylar: Use natural bedding materials such as straw, feathers, and paper to form a warm bed for the chicks. Then line the outside of the brooder box with reflex or Mylar.
Socks filled with rice: You may fill a few socks with rice and warm them up in a microwave. Put these socks in the brooder and let the chicks huddle around it to stay warm and comfortable.
Hot water bag: One more option to keep your chicks warm is putting hot water bags wrapped in fleece in the brooder.
One tiny note, while you are following these solutions, you will need to replace the rice socks or hot water bags every 3 to 4 hours.
Do new chicks need light at night?
Not really. As long as they have a heat source, they don’t need light. But, many new chick owners use a heat lamp to keep their babies warm, and that also provides a dim source of light.
Will a light disturb the chicks at night?
Chickens have very bad night vision. So light is helpful for them in the first few days to help them find food and water. They can see their mates and understand their surroundings. It makes them more comfortable at night. However, a red light bulb is preferred over a bright light source such as a white bulb.
Even if you want to switch the light off, do not do it all at once as it may panic your chicks. Try to mimic a more natural pattern by gradually reducing the light.
Will baby chickens die without a heat lamp?
Newly hatched chickens do not have sufficient feathers on their body to maintain a constant body temperature. They rely on external sources to stay warm and healthy. Under natural conditions, the heat source is their mother and otherwise, the heat lamp serves as the heat solution. If you are not providing the chicks with a heat lamp or other heat source, they will catch a chill and will fall sick. It will eventually kill them.
Is it bad to hold baby chicks?
There is not much to be concerned about when holding your chicks. You can hold them from the time they are dry and fluffy. Be very gentle while holding these young chicks so that you do not hurt them. Encircle the chick’s body with your hand and allow its head to peek out of your hand. Do not hold them so tightly that they struggle to move at all, as it may distress them. Avoid holding a baby chick by its wings, head, feet, or tail.
When you should not handle chicks and chickens
Most people will not have any trouble handling baby chicks. However, there are a few groups of people who should avoid handling chicks, such as people with allergies or asthma or people with severe autoimmune conditions. You should also not handle chicks if either you or the birds are ill or undergoing treatment. Some avian medications may cause allergic reactions in humans.
It is unlikely and rare that someone is made ill by backyard chickens. The most common infection to catch from a chicken is a stomach bug like E Coli.
When can baby chicks go outside?
Baby chicks can start having short outdoor trips from three to four weeks. Raising your chicks is more entertaining when you take them out to peck at grass and chase down bugs. The only things to be concerned about are the weather, the outdoor temperature, and the chicks’ ages. These field trips help the chicks get some exercise and expand their food sources.
When can chicks go outside permanently?
“Fully feathered” is the point when chickens can self-regulate body temperatures. They do it by fluffing their feathers and creating air layers. However, take some time before allowing your chicks to sleep outside. Wind or rain can easily chill a chick. Under the right weather conditions, they can spend the whole day outdoors. If you have a flock, introduce the chicks into it slowly.
Build an outside playpen for your chicks that gives them enough outdoor time while protecting them from cats or other predators. Keep it fully enclosed, and the openings too small for the chick to squeeze through. Having an open-top may attract small wild birds that are capable of spreading disease.
Keep food and fresh, clean water available in the playpen. Arrange shade and a tiny shelter for the chicks to rest. Cardboard boxes are a good option.
When you have to move them indoors for rain or when it is dark, carry them one at a time out of the playpen. When you move them inside, turn the heat lamp off as babies are now about 6 weeks old. Make the transition gradually from a heated indoors to outside shelter. Let them experience days and nights within your house.
During these field trips, you may see one or two sick chicks as new environments bring new exposure. If they show any signs or symptoms of any disease, consult the vet and treat your chicks. A few health problems are coccidiosis (here’s how to treat coccidiosis), infectious bronchitis, Marek’s disease (learn more about Marek’s disease), omphalitis, and Salmonella.
Whether the chicks stay outside or inside, always provide clean bedding, food, and water. Be observant of their activities. Are they huddling to keep warm, or being lethargic? If they are happily flapping around and pecking the ground, then your baby chickens are healthy and sufficiently warm.
Chicken Coop
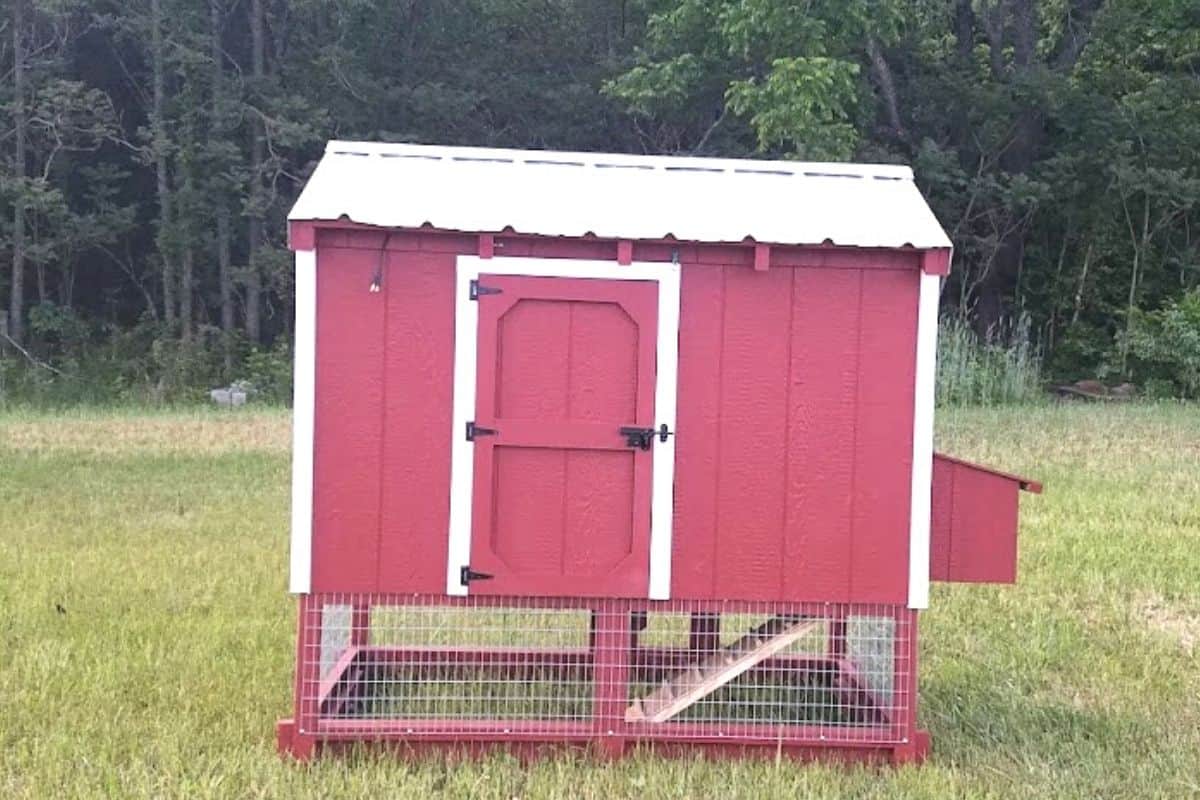
When your chicks are about 8 weeks old and have had good outdoor exposure for the last couple of weeks, they are ready to move to their chicken coop. If you already have a flock, the flock may have accepted the babies by now, but if you are raising chicks for the first time, what about building a coop for your chickens?
First and foremost, your chicken coop must be predator-proof for the safety of your chickens. If you are thinking of buying a second-hand coop, start looking for one early.
Secondly, select a good location to place the coop. Coop hygiene is an essential practice to prevent disease in your flock. Build the coop on high ground to avoid flooding.
There should be three square feet of space per bird. A predator-proof outdoor range is a good option to have so that the birds can flock and roam during the day hours. In the absence of an outdoor range, increase the indoor space to 8 to 10 square feet per bird.
Overcrowding the coop may lead to a fight within the flock. It also adds up to fecal matter building up very quickly. Overcrowding may lead to a growth of bacteria within the coop causing an unhygienic environment and increased risk of disease. Having a protected outdoor range area with proper airflow and ventilation will keep the flock safe and healthy.
You will need a door to access the chicken coop to clean, provide water, and feed. Place a 6-inch layer of straw or wood shavings for bedding. You will need to change the bedding at least once a month.
A simple and easy chicken coop structure is more than sufficient for your chicks. Keep it sufficiently large, warm, and clean for your backyard flock to have a perfect home.