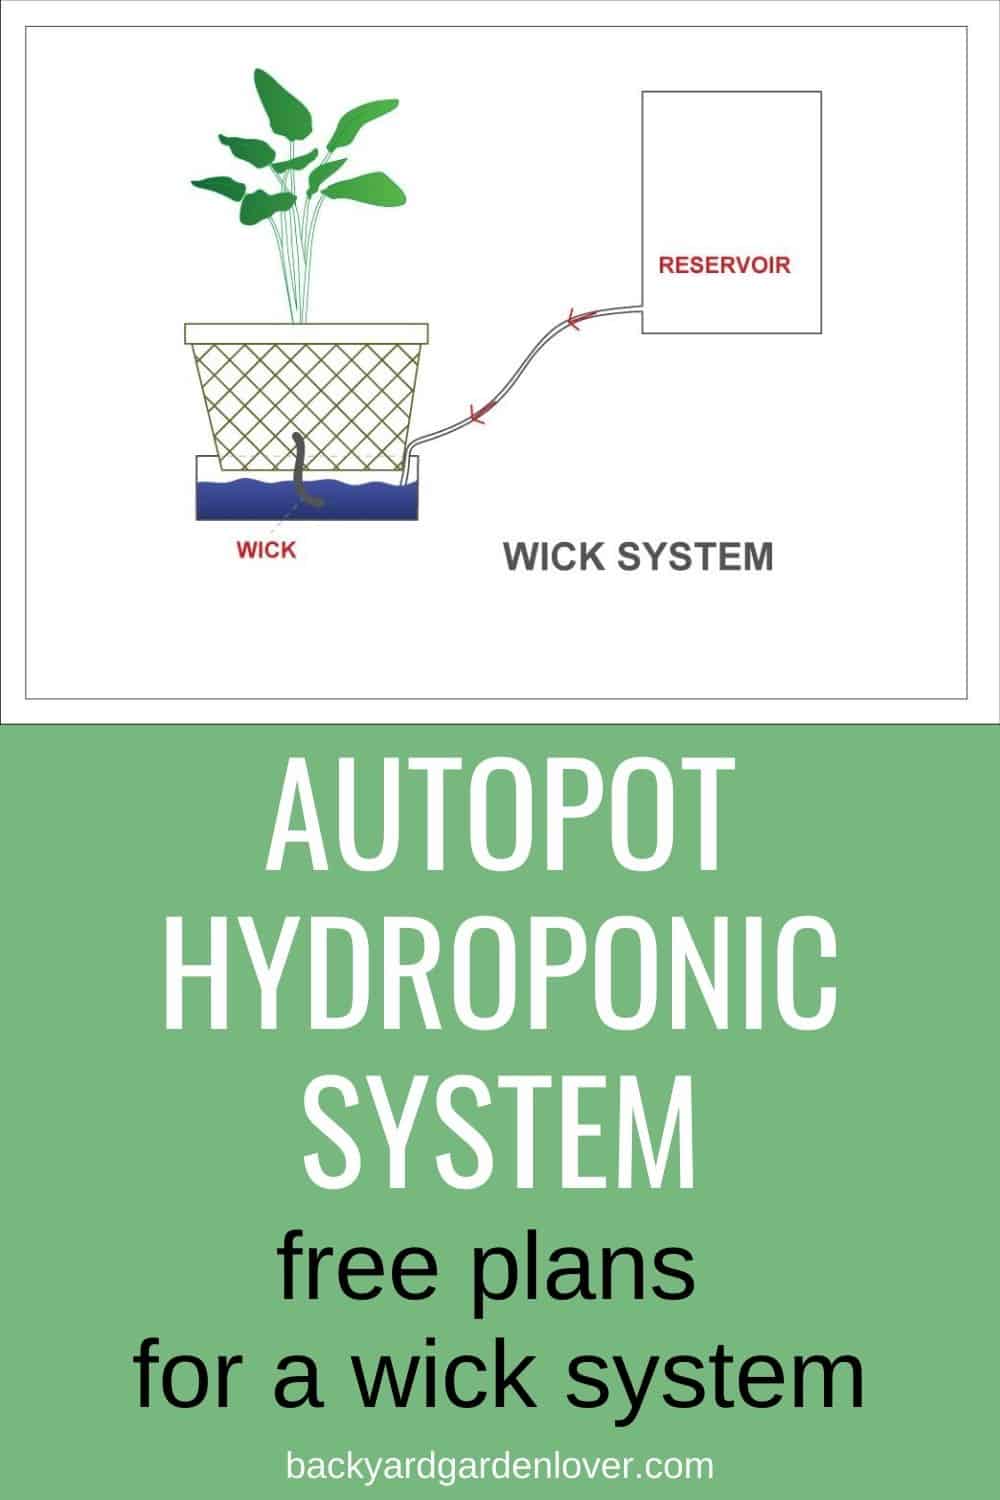
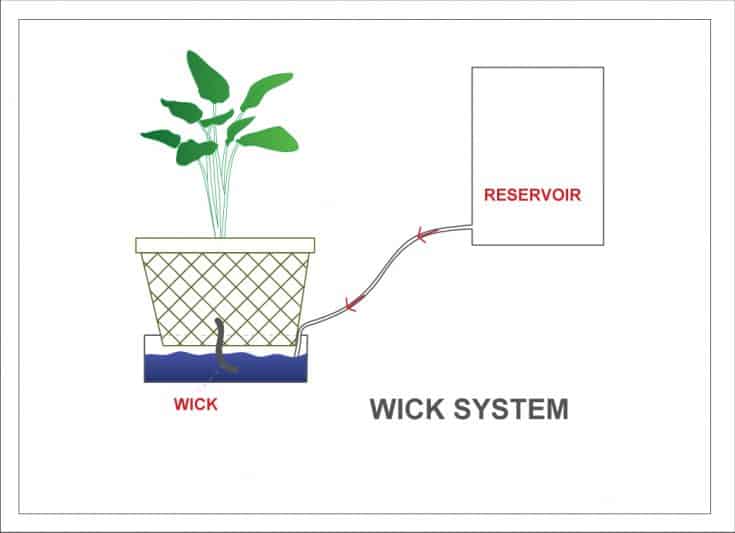
The Autopot hydroponics system (wick method) is the hydroponic No Brainer! It is the only truly passive system for growing herbs and veggies. It does not require electricity, pumps, timers, or aerators. The nutrient is fed to the plant’s roots via wick action.
Our Beginner’s Guide To Hydroponics is on sale for a short time. Check it out!
Wick systems are best for slower growing, long-term plants like figs, African violets, patio tomatoes, and specimen houseplants (and lazy or forgetful gardeners).
Disadvantage: You will not see the “super-charged” growth as with other systems that flood the plants liberally with nutrient solution. But these do make a good, dependable, trouble-free growing system.
How does autopot hydroponics work?
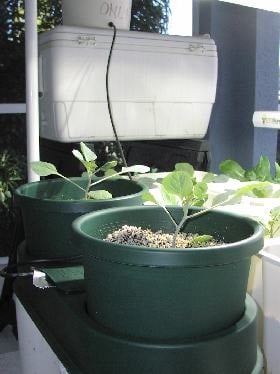
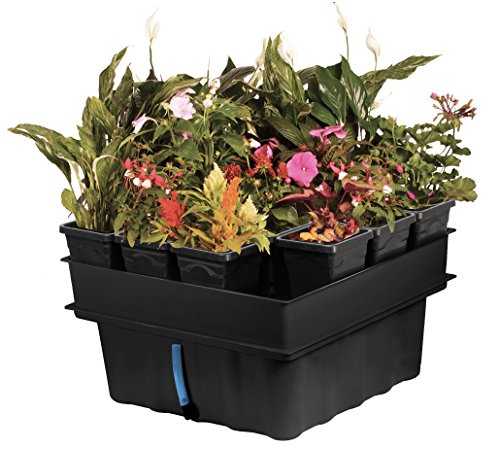
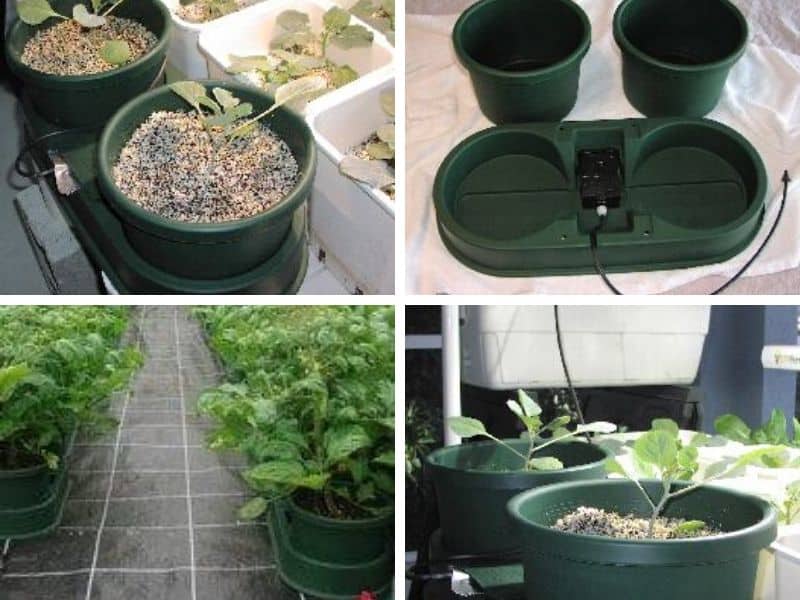
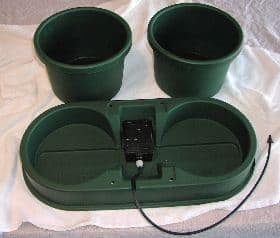
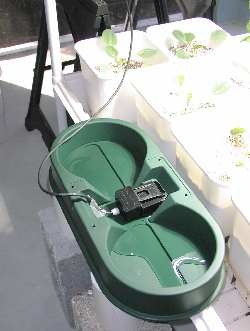
The plant is potted in a large pot with a wicking mat at the bottom. The nutrient solution is gravity-fed into the saucer or tray the pot sits in. No electricity required! Each Autopot module includes 2 pots and one tray with a patented “smart valve” to regulate the flow of solution.
How to build a small wick system
We recommend a “store-bought” module for this super-easy hydroponic project, the AutoPot®.
AutoPots® are patented kits that are essentially “self-feeders”. They can be used for hydroponic setups (no soil) or can be planted with traditional potting soil. The heart of the unit is the special “Smart Valve”, which regulates the flow of nutrient solution into the holding tray.
 AutoPot AP400 Easy2GO Holiday Watering Kit – Blue |
 AutoPot 4pot System Gravity Fed Watering System |
") AutoPot Smart Pot 6 Pot XL System with 25 Gallon Flexi Tank (5 gal Smart Pots) |
When connected to a simple gravity-fed reservoir, the Autopots® automatically provide on-demand irrigation to plants, then remain closed until the medium dries somewhat. This simulates the wet/dry cycle of natural rainfall and makes for a very productive system.
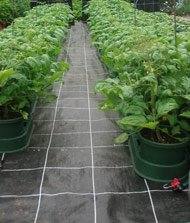
We have included this system in our free hydroponic plans not so much as a “build it yourself” project, but because we wanted to introduce you to this amazing system. Some very successful commercial greenhouses are set up with nothing but rows and rows of AutoPots®.
We also recommend a complete, all-inclusive kit like the one below. A super simple wick system makes a great intro to hydro.

Wick Hydroponic System – Getting Set Up
Our instructions here provide two large pots, and the total cost is about $60 (not including a lamp and food). You can easily add more modules later to make a whole “AutoPot® farm” if you would like.
Supply list
- AutoPot® basic module (comes with a grommet and 1/4” tubing). *Please note the new generation Autopots® are square, they look different from our photos here, but it’s the same product.
- Extra 1/4” black irrigation tubing if a longer length is needed [Home Depot]
- 2-gallon bucket [Walmart]
- Growing medium: 50/50 Coco coir and perlite
Tools needed
- Power drill
- 1/4” drill bit
Getting set up for a wick hydroponic system is easy and it has the benefit of never needing electricity, aerators, pumps, and al the other hydroponic systems.
The wick hydroponic system is amazing! Easy to build and operate, everyone should try it.
Instructions
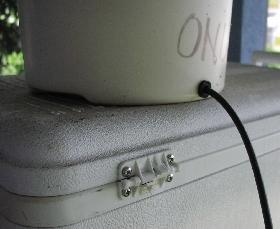
1. Using the power drill, drill a 1/4” hole near the bottom of the bucket. Carefully seat the provided grommet into the hole, making sure it flares out evenly inside and outside the bucket. Push one end of the 1/4” tubing supplied into the grommet so it extends only about 1/4” inside the bucket.
2. The bucket is going to be the nutrient reservoir, so it must sit up higher than where the AutoPot module will reside. The fluid is gravity fed into the AutoPot trays. No pumps, no timers, no aerators! Now insert the other end of the tubing to the inlet port on the AutoPot. Just follow the instructions provided. Guess what? You just built an AutoPot® hydroponic system!
3. Now test the pot for proper operation of the Smart Valve. Pour some water into the holding bucket. Water should slowly fill the holding tray below until it reaches a level of about 1”. Then it should cut off.
4. Filling the pots – Each kit comes with a round “root mat” which sits at the bottom of each plant pot. It keeps the medium in and helps wick up the nutrient solution to the plant roots. The growing medium is actually the “wick” for this hydroponic system.
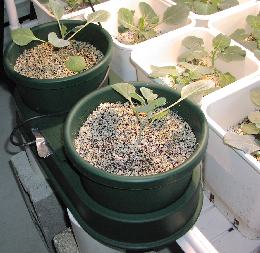
5. Plant your young seedlings in the pots and place the pots in the holding tray. You are ready to rock’n roll now, time to add food.
6. The nutrient solution is a pretty care-free chore in this system. Because the fluid is not re-used, once mixed, you don’t have to worry about strength or pH. Mix it and forget it! A 2-gallon bucketful will last several days, depending on the size of the plants and the climate. So, mix up a 2 gallon batch of your favorite nutrient formula, then adjust the pH (read our recommendations below). That’s it… just sit back and watch ’em grow!
Wick Hydroponics Expanding the System
This modular growing system is very easy to expand. You just buy more modules and “t” into the irrigation tubing to provide the nutrient solution to each grow tray. Of course, after about 2 modules, it will be necessary to provide a larger reservoir for the solution.
But as we said earlier, you can create an entire greenhouse filled with nothing but Autopots… the hydroponics “no brainer”. Each Autopot purchased comes with diagrams of various arrangements to help you plan a larger Autopot garden.