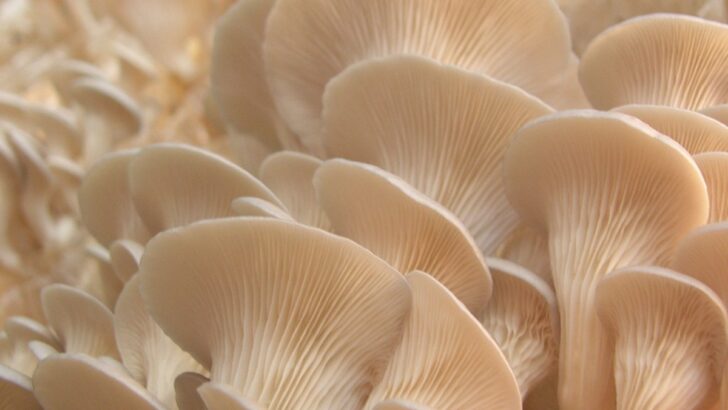

Oyster mushrooms are a flavorful delicacy often used as a meat substitute due to their fibrous texture and ability to absorb the flavors of the dish they’re cooked in. There are several varieties, some of which can be quite expensive. Prices typically range from $5 to $15 per pound, depending on how they’re grown and where you live.
You can easily cut costs and have tasty oyster mushrooms on hand by growing them yourself using something you already have on hand—a laundry basket. Nathan Heinrich, horticulturist and botanical designer, walks us through the entire process so you can turn a laundry basket into a mushroom-growing machine.
What You’ll Need to Grow Oyster Mushrooms
Heinrich says that laundry baskets, specifically plastic ones, are the perfect vessels for growing mushrooms. You want to use a basket made of non-organic material, such as plastic, so that moisture and fungus do not degrade the container’s walls.
Here are the supplies you will need to gather for your mushroom-growing project:
- Laundry Basket: A plastic basket with plenty of ventilation holes.
- Mushroom Spawn: Grain spawn or sawdust spawn (you can order online).
- Substrate (growing medium): Straw, hardwood sawdust, or a premade mushroom mix (pasteurized or sterilized).
- Large Pot or Tub: For pasteurizing the substrate.
- Plastic Sheet or Humidity Tent: To cover the basket and maintain humidity.
- Spray Bottle: For misting water.
- Thermometer and Hygrometer: To monitor temperature and humidity.
- Rubber Gloves: For cleanliness during handling.
- Twine or Elastic Bands: To secure the humidity tent.
- Clean Work Area: Sterilized surfaces to avoid contamination.
Instructions for Growing Oyster Mushrooms
Before we dive into how to grow oyster mushrooms, please ensure that you do not have an allergy to them. Some people may have an allergic reaction when growing and eating mushrooms. If you’ve never had mushrooms before, then you may want to get tested first.
That said, here is Heinrich’s step-by-step process of growing oyster mushrooms using a laundry basket.
Step 1: Soak the Straw
You will start by soaking your straw (your growing medium) in a tub of hot water at 180 degrees for at least one hour. This will pasteurize the straw and soften and hydrate it. You can skip this step if you buy a pre-made sterilized mushroom medium.
Step 2: Wring Out Moisture and Cut the Straw
After the straw has soaked and cooled, wring out the excess moisture and cut it into 1 to 3″ lengths. Wearing rubber gloves, start by loosely sprinkling the first layer of cut straw into the bottom of the basket.
Step 3: Inoculate the Straw
Next, begin to “inoculate” the straw by generously scattering the mushroom spawn into the straw after every layer of new straw. Mix at a rate of 90% straw to 10% mushroom spawn. Keep the layers to about 3″ thick.
After each layer, press the straw down gently without over-packing it. You will want to continue the process until you are about 6″ from the top of the basket.
Step 4: Cover with Clear Plastic
Once the basket is filled to 6 from the top, place a piece of clear plastic over it, making sure it is not airtight to allow for airflow. The point is to retain moisture while allowing airflow. Think 80% closed to 20% airflow points. You can use string or elastic bands to hold the plastic in place.
Step 5: Store in a Dark Warm Space
The next two weeks will be the “incubation period,” which can last between 2 and 4 weeks. Store the basket in a warm and dark room or grow tent. Keep the temperature between 65 and 75 degrees Fahrenheit.
Regularly check the humidity levels under the plastic cover and spray with distilled water to keep moisture levels high. It’s during this period that the mushroom fungus will mature and spread through the basket.
Step 6: Move the Basket to a Cool Space with Indirect Light
To trigger the mushrooms to fruit, you need to move the basket into a cooler space with indirect light and a lower temperature of 55 – 65 degrees. This change in temperature will “stress” the fungus and cause it to “flower” or “fruit.”
If you have a garage or garden shed with windows providing indirect light, those are ideal locations for the fruiting phase.
Step 7: Monitor Your Mushroom Basket
Your oyster mushrooms will begin growing rapidly. As long as the process is done correctly, you should have mushrooms within days. Keep your eyes on the basket and loosen the plastic for a bit more airflow while continuing to maintain high moisture levels.
Having a humidity sensor will be handy; you want to ensure the humidity is between 85% and 95% in your grow tent or under the plastic.
You should see “pins,” or what will eventually form mushrooms, anywhere from a few days to two weeks.
Step 8: Pick and Enjoy Your Oyster Mushroom Crop
About a week to ten days later, once the heads of the mushrooms flatten out, they are ready to harvest. But make sure you pick them before the tips curl upward, as this is when they are the most tender.
There you have it. You can grow yummy oyster mushrooms from the comfort of your own home. Once you have all your supplies, you can propagate your mushrooms and have an endless supply to make all sorts of delicious dinners and healthy snacks.