If you’re looking for an easy way to pack more nutrients into your meals without going broke, sprouts are the answer.
These tiny greens are a powerhouse of vitamins and minerals, and can easily be grown at home for a fraction of the cost of store-bought sprouts.
@
BobbyParrish shares a video on YouTube showing just how simple it is to DIY sprouts.
If you enjoy adding a tasty crunch to your salads, sandwiches, or soups, you’ll be on board once you learn how easy it is.
Why Make Your Sprouts at Home?
If you’ve ever bought sprouts from the store, you know they can be quite expensive. I’ve seen a small 8-ounce box of alfalfa sprouts sold for anywhere between $5 and $10, depending on the store or farm. At home, you can literally make entire jars of sprouts on repeat for weeks (or months), all from a bag of seeds that costs under $20.
Aside from saving money, DIY sprouts are safer too. There have been numerous recalls of store-bought sprouts due to contamination. At home, you can use clean water, a clean jar, and clean seeds to ensure your sprouts are safe to eat without the risks. Even at home, it is
recommended to carefully wash the seeds, since this is often where bacteria originate and spread, leading to foodborne illness.
The final golden ticket is nutrient density. Compared to seeds or full-grown plants, sprouts have the
highest concentration of vitamins and minerals like folate, manganese, phosphorus, and vitamins C and K.
What You’ll Need
For the easiest start, Parrish recommends hopping on Amazon and grabbing a “sprout kit.” If you want to DIY it, look around your home for these items or grab them at your local store.
- A glass jar or container with a lid (a mason jar works great)
- Cheesecloth and a rubber band or a custom-fit strainer lid
- Seeds of your choice (alfalfa seeds, broccoli seeds, sunflower seeds, radish seeds, etc.)
- Water
Step-by-Step Guide
Growing sprouts takes 5 to 10 days and is surprisingly easy. While 5 days may feel like a long time, you only have to monitor them for a few minutes a day (at most), and the results are worth it. Parrish shares his steps to a yummy snack.
- Start by rinsing and cleaning your quart-size jar thoroughly.
- Measure out about 2 tablespoons of seeds and place them in your jar (you can try a mix or multiple types at once if you have more than one jar)
- Place the seeds in the jar and fill it about halfway with water.
- Cover the top of the jar with a straining lid (or cheesecloth and rubber band)
- Let the seeds soak overnight in the fridge (about 8-10 hours)
- Drain the water and rinse the seeds thoroughly.
- Place the jar upside down at a tilt (to allow continued draining) in a spot where it will not be exposed to direct sunlight
- Monitor the sprouts and rinse them as needed until they are ready to eat!
Time to Enjoy
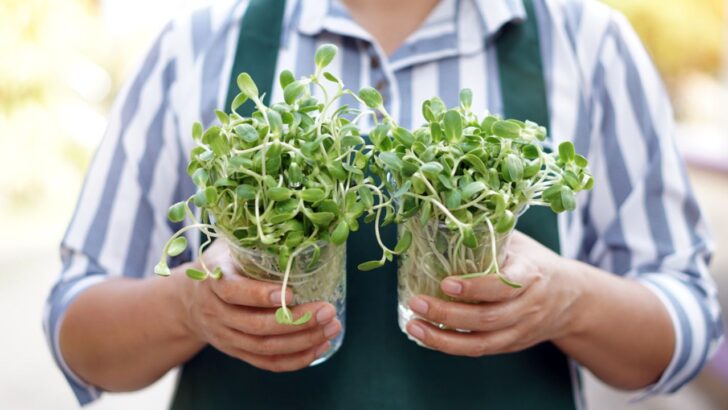
Once your sprouts have grown to about 1-3 inches in length, they are ready to consume immediately. You can also store them in the fridge for up to a week if you want to enjoy them over multiple meals.
Simply rinse them off, pick off any shells (important with sunflower seeds, my personal favorite), and add them to any meal for an extra crunch and boost of nutrients. My personal favorites for adding sprouts are sandwiches and Asian stir fry. Yum!
Read More:
17 Vegetables You Should Try Fermenting at Home (They Taste So Good)
15 Plants That Look Great in the Store But Struggle at Home
-
Bonnie's interests include hiking, a passion she nurtured while living in Upstate New York, and cooking, gardening, and home decorating. These hobbies allow her to express her creativity and connect with nature, providing a well-rounded balance to her busy life. Through her professional achievements, community involvement, and personal pursuits, she embodies a holistic approach to life, dedicated to service, growth, and well-being.
View all posts