
Grout has this sneaky ability to quickly switch from a bright white to a color with more backstory than your favorite sitcom character. In August, your tile looks great, and by November, it seems like it was part of a mud-wrestling event. Clean grout is more than just appearances; trapped dirt and moisture can make things less pleasant for your home.
This article will guide you through a straightforward, three-step process to get those grout lines looking new again.
1. Mix and Apply a Cleaning Paste
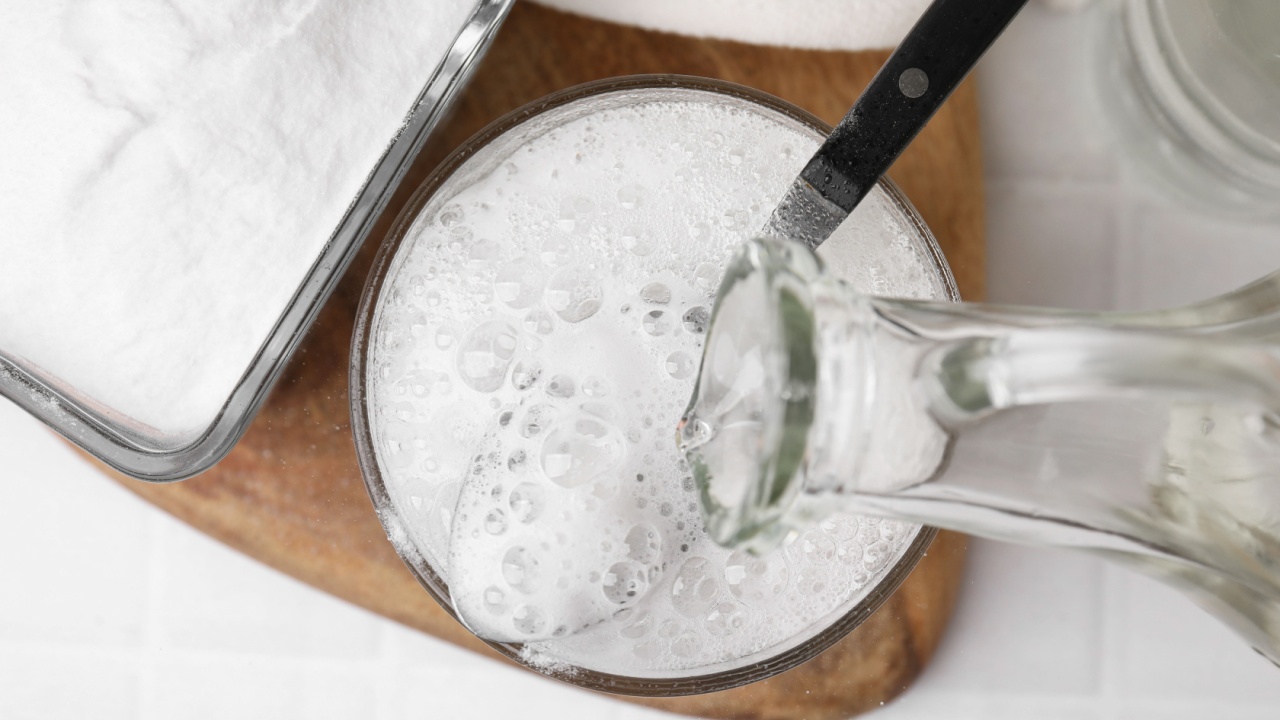
Image Credit: Shutterstock.
Get started by mixing up a cleaning paste that clings to grout lines rather than running off your tiles or forming puddles on the floor. A handy combination is two parts baking soda to one part hydrogen peroxide, which creates a gritty, toothpaste-thick paste. Baking soda takes care of gentle abrasion, while hydrogen peroxide helps lift stains.
If you want a non-toxic approach or have colored grout, oxygen bleach powder, and water, make a good paste for organic stains. A baking soda and vinegar combo also works, but do a test spot first since vinegar is acidic. Apply your chosen paste with a spatula, an old toothbrush, or your gloved finger, covering every grout line. Let the paste sit for 10 to 15 minutes to allow the ingredients to work on the grime. This patience pays off, breaking down all the buildup in the grout so you’re ready for the next step.
2. Scrub Each Grout Line
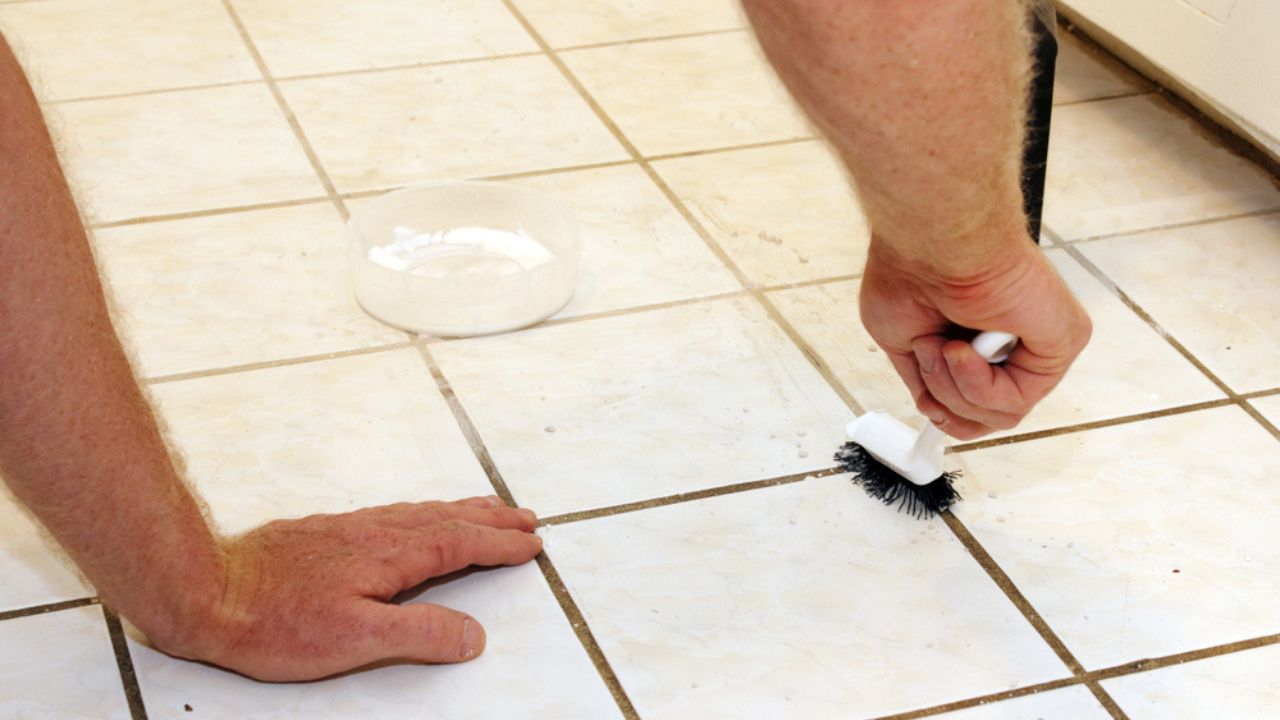
Image Credit: Deposit Photos.
Once you’ve waited, it’s time for some scrubbing. Choose a grout brush with firm, angled bristles, since it’s made to fit into narrow grout lines and get at the tough gunk. If you don’t have one, a sturdy toothbrush is a decent alternative. Electric toothbrushes can also make things easier by doing some of the work for you. Skip any soft-bristled brushes, as they won’t get into the grooves enough.
Scrub in circles along each grout line, covering small areas at a time with steady effort. The circular motion helps break up dirt from all directions, making the paste turn a whole new shade as it grabs the mess. Focus on one section at a time—a stubborn patch may need a few extra passes. Slow and steady here sets you up for grout lines that really do look refreshed.
3. Rinse and Check Progress
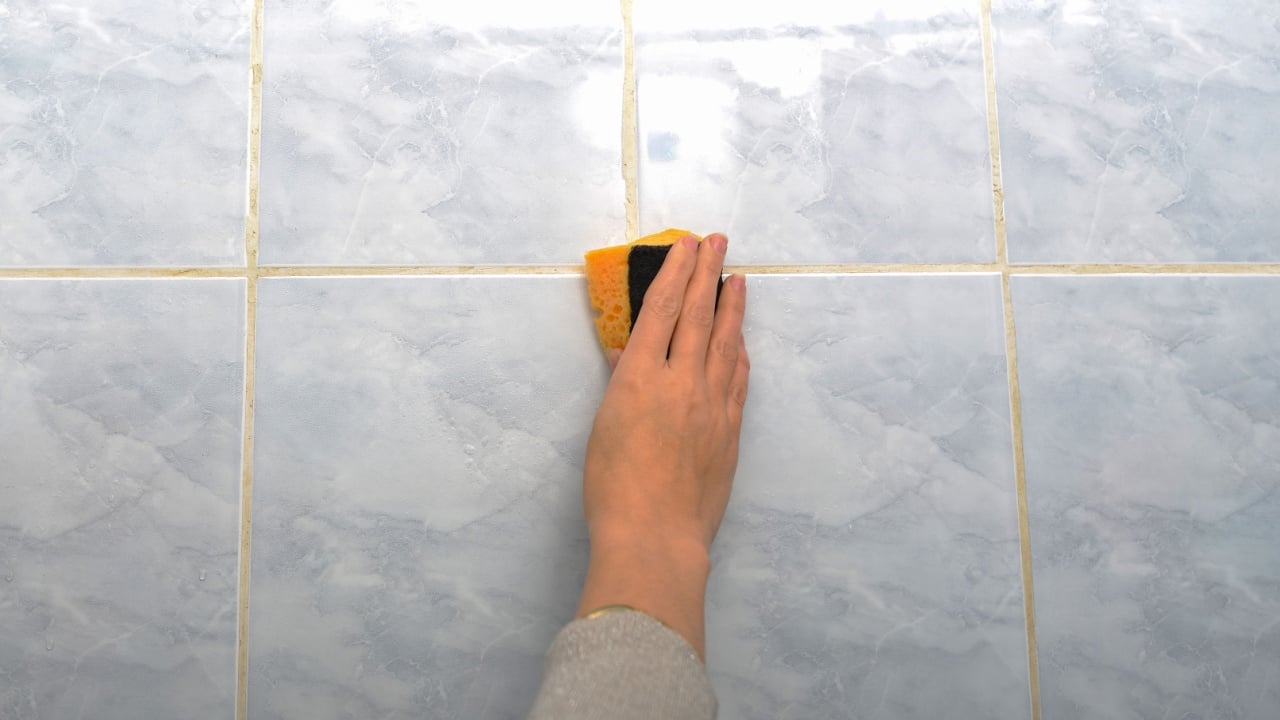
Image Credit: Shutterstock.
After scrubbing, it’s time to clear away the paste and see the results. Use a sponge or a clean cloth soaked in warm water to wipe everything down, along with the grime you just loosened. If your grout lines are on a shower wall, a handheld sprayer can make rinsing easier. Remember to rinse your cloth or sponge often, since bringing dirty water back just adds more mess.
Now check your grout lines. If stubborn spots remain, repeat the process: add more paste, let it sit, and scrub again. Rinse well one more time and allow everything to dry. Grout sometimes looks darker when wet, so the final results are clearer once it’s fully dry.
Keep Your Grout Looking Fresh
Image Credit: Shutterstock.
A few small actions make a big difference in keeping your grout clean. Try spraying tile and grout with a daily shower cleaner or a vinegar-water mixture after every use. This helps block soap scum and mildew. For long-term results, apply grout sealer once everything is clean and dry. A good sealer protects by making it harder for dirt and water to get in, helping you spend less time fighting future stains. Reapply the sealer each year for best results, and your tiles will stay looking fresh much longer.