The temperature is dropping and the days are getting shorter, which means your garden is about to face its toughest challenge of the year. You might be tempted to retreat indoors with a hot drink and ignore the looming frost, but your bushes do not have that luxury. They are stuck outside facing freezing winds and heavy snow, and they need your help to survive until the sun returns.
Ignoring this preparation often leads to a disappointing discovery of dead branches or entirely dead plants once the snow melts. Taking the time now to properly prepare your shrubbery ( if you haven’t already) creates a massive difference in how vibrant and healthy your landscape looks when the growing season kicks off again. Here are ten steps that will help your green investments thrive
1. Prune with Precision

Image Credit: Shutterstock.
Leaving dead or diseased wood on your bushes during the cold months invites rot and pests to take up residence deep inside the plant structure. You need to prune and remove anything that looks damaged, dead, or dying, as these compromised areas are the first to succumb to heavy snow loads or ice storms. Crossing branches are another hazard because they rub against each other in the wind, stripping away bark and creating open wounds where infection enters.
Making clean cuts at a forty-five-degree angle just above a bud encourages healing and directs water away from the cut surface. Be aggressive with the dead weight but gentle with the healthy structure, as you want to leave enough robust growth to support the plant through its dormancy.
Quick Scan:
- Disease Prevention: Eliminates hiding spots for fungal spores and bacterial infections.
- Structural Integrity: Reduces the risk of branches snapping under the weight of snow or ice.
- Energy Conservation: Directs the plant’s remaining energy toward root health rather than maintaining dying limbs.
2. Sanitize and Reduce Disease Risk

Image Credit: Shutterstock.
While a layer of fallen leaves and twigs can seem picturesque, it can also harbor pathogens that threaten your shrubs. Many fungal leaf‑spot diseases overwinter on dead leaves; in the spring, spores from these leaf piles can re-infect new growth. Removing and disposing of infected leaf litter significantly reduces this disease pressure.
Quick Scan:
- Remove all fallen leaves from the immediate perimeter.
- Discard diseased debris in the trash rather than the compost pile.
- Clear away weeds that compete for waning nutrients.
3. Feed with Love

Image Credit: Shutterstock.
Fertilizing right before winter sounds wrong because you do not want to encourage tender new growth that will immediately freeze and die. Instead of nitrogen-heavy fertilizers that push for green leaves, you need to focus on amendments that support root strength and soil health. Adding a layer of organic compost or a slow-release fertilizer low in nitrogen helps the root system store energy without triggering a growth spurt.
This type of feeding is like packing a lunch for a long hibernation rather than an energy drink for a marathon. The nutrients break down slowly over the cold months, becoming available exactly when the plant wakes up and needs a boost. You are essentially banking resources in the soil that the bush will draw upon the moment the ground thaws.
Quick Scan:
- Avoid Nitrogen: Prevents rapid, frost-susceptible growth.
- Add Phosphorus/Potassium: Supports root hardening and disease resistance.
- Use Compost: Improves soil structure and microbial activity during dormancy.
4. Mulch Generously
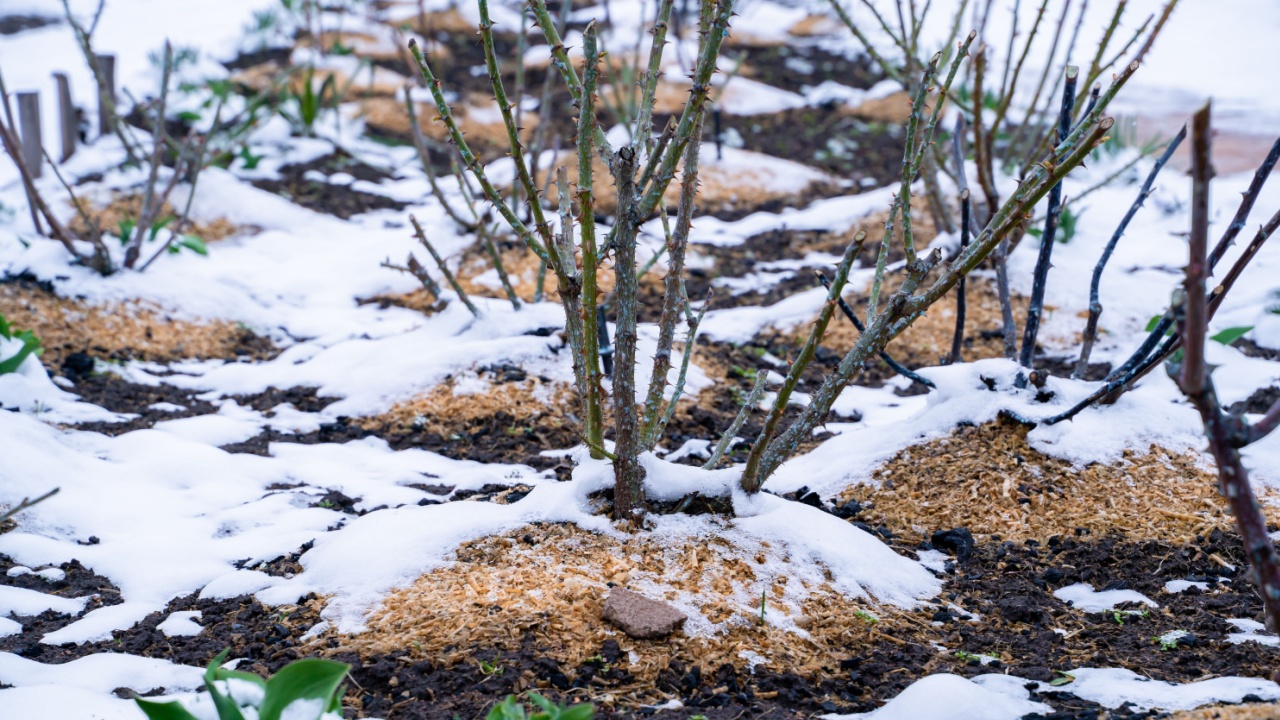
Image Credit: Shutterstock.
Bare soil is a recipe for disaster when temperatures fluctuate wildly because the freeze-thaw cycle can heave roots right out of the ground. Applying a thick layer of mulch acts as a heavy blanket that regulates soil temperature and keeps it consistent regardless of the air temperature. You should aim for a layer that is three to four inches thick, spreading it out to the drip line of the bush to cover the entire root zone.
Organic mulches like wood chips, shredded bark, or pine straw are fantastic because they decompose over time and add organic matter back into the earth. Be careful not to pile the mulch directly against the trunk or stems, often called “volcano mulching,” as this traps moisture against the bark and leads to rot.
Quick Scan:
- Insulation: Protects roots from extreme cold and rapid temperature swings.
- Moisture Retention: Keeps the soil hydrated during dry winter spells.
- Weed Suppression: Stops winter weeds from taking hold.
5. Water Wisely

Image Credit: Shutterstock.
Many people hang up their hoses as soon as summer ends, but sending a bush into winter with dry roots is a death sentence. Water acts as an insulator within the plant cells, and a well-hydrated plant is far more resilient to cold damage than a thirsty one.
You need to continue watering your bushes deeply and thoroughly until the ground actually freezes solid. This saturation creates a reservoir of moisture in the soil that the roots can access even when the surface is frozen. Desiccation, or drying out, is the primary killer of evergreens and shrubs during winter because the wind strips moisture from the leaves faster than the frozen roots can replace it. A deep soak before the hard frost gives your plants the internal resources to withstand drying winds.
Quick Scan:
- Deep Soak: Water deeply once a week until the ground freezes.
- Monitor Rainfall: If autumn is dry, manual watering is mandatory.
- Morning Routine: Water early in the day so the plant absorbs it before temperatures drop at night.
6. Prevent Snow and Ice Damage
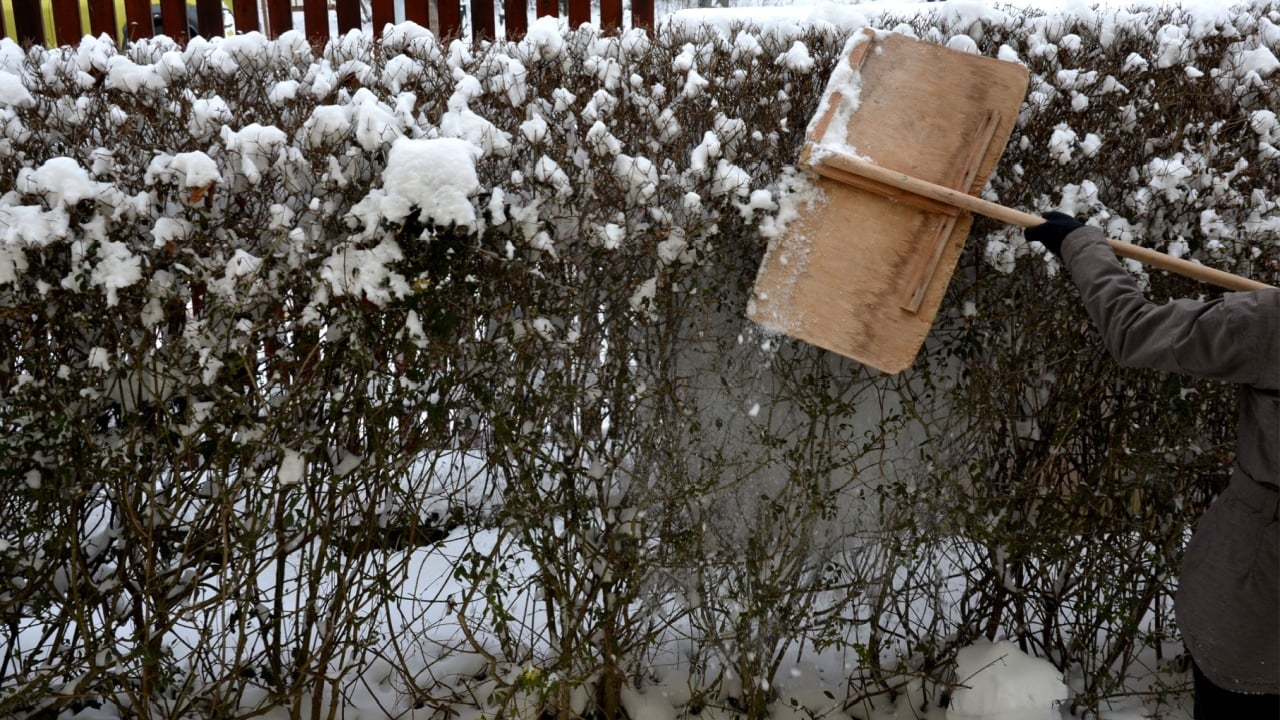
Image Credit: Shutterstock.
Heavy snow and ice can weigh down branches, bending or breaking them and creating wounds that invite disease. To prevent this, gently brush off accumulated snow with a broom, starting at the top and working downward so you don’t add more weight to fragile limbs. For larger shrubs, you can loosely tie branches together with soft twine or plant ties to provide extra support and reduce the chance of splitting.
Avoid forcing branches into unnatural positions, as this can cause cracks or weaken structural integrity. This step ensures that your bushes maintain their shape and health throughout the winter, reducing the risk of long-term damage that could compromise growth in the spring.
Quick Look
- Gently brush snow off branches from top to bottom.
- Loosely tie vulnerable branches together with soft twine for support.
- Avoid forcing branches into unnatural positions to prevent cracks.
- Keeps shrubs intact and healthy through winter, reducing spring damage.
7. Inspect and Adjust
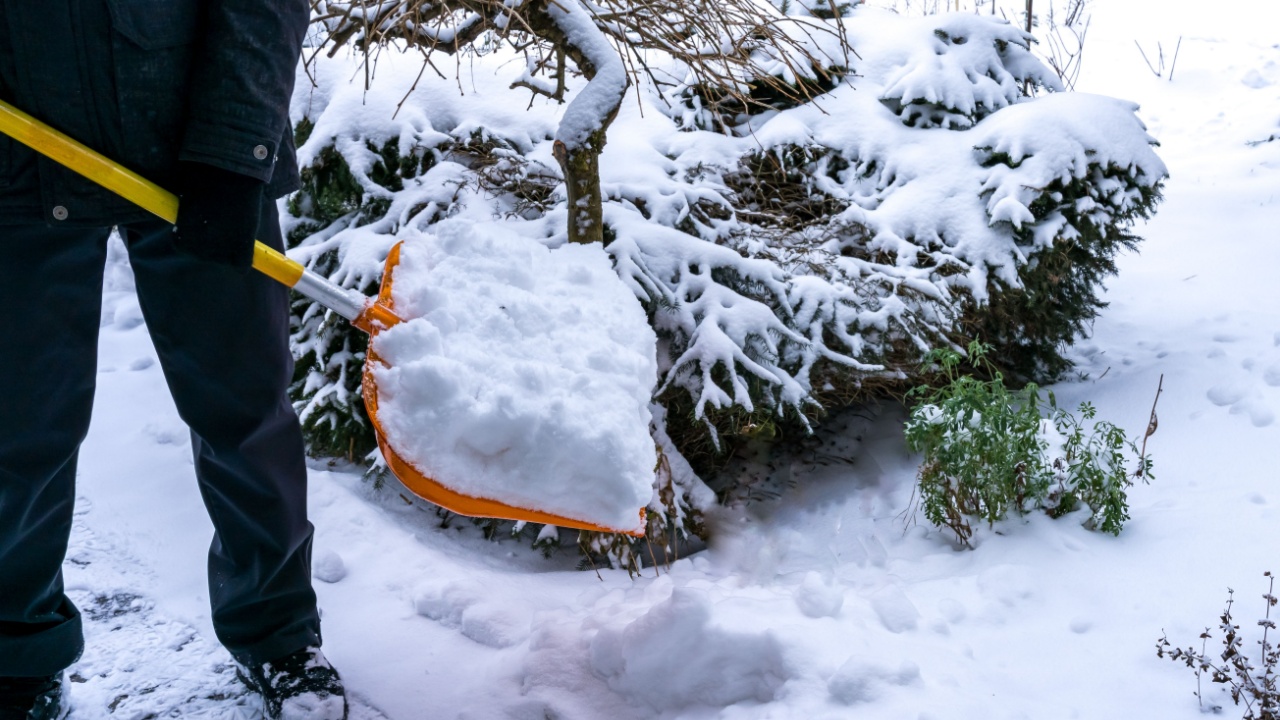
Image Credit: Shutterstock.
Your job isn’t done once the initial winterizing is complete because winter is dynamic and conditions change rapidly. You need to periodically walk through your garden to check on the structural integrity of your protections and the health of your bushes. Heavy snow might knock down your burlap screens, or animal activity might disturb your mulch layers.
Rodents love to nest in the cozy mulch right next to delicious bark, so checking for signs of chewing or tunneling is vital. If you catch these issues early, you can re-secure a barrier or set up deterrents before significant damage occurs. It also gives you a chance to brush off heavy, wet snow from delicate branches before they snap under the weight.
Quick Scan:
- Re-secure Wraps: Fix any burlap or twine loosened by wind.
- Check for Pests: Look for gnaw marks near the base of the stems.
- Snow Removal: Gently brush heavy snow off branches with a broom.
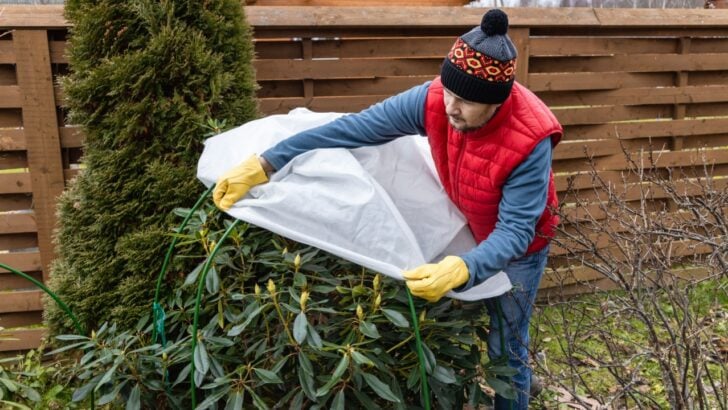
8. Shield from Harsh Winds

Image Credit: Shutterstock.
Wind is often more damaging than the cold itself because it accelerates evaporation and causes physical breakage. Build a burlap enclosure or position temporary windbreaks on the prevailing wind side of your vulnerable bushes. You can use plywood, canvas, or even bales of hay to deflect the strongest gusts away from the plant.
This is particularly crucial for broadleaf evergreens like rhododendrons and hollies, which keep their leaves all winter and suffer immensely from windburn. The leaves turn brown and brittle when they lose water faster than they can take it up, essentially freeze-drying the foliage. A strategically placed shield reduces wind velocity and preserves the moisture balance within the leaves.
Quick Scan:
- Identify Direction: Know where your prevailing winter winds come from (usually North or West).
- Temporary Walls: Use bales of straw or plywood to create a buffer.
9. Wrap the Base with Straw or Leaves

Image Credit: Shutterstock.
For grafted bushes like hybrid tea roses or plants that are sensitive to root freeze, mounding or hilling is a non-negotiable step. You pile loose soil, compost, or straw around the base of the plant, covering the crown and the first few inches of the canes. This mound insulates the graft union, which is the most vulnerable part of the plant, keeping it slightly warmer than the ambient air temperature.
If the top of the bush dies back completely, this protected base ensures that the plant can regenerate from the graft rather than the rootstock. You must wait until the ground has frozen slightly before doing this to avoid inviting mice into the warm pile.
Quick Scan:
- Height: Mound soil or straw 6 to 10 inches up the stems.
- Timing: Apply after the first hard frost to discourage rodents.
- Material: Use well-draining material like straw or bark to prevent rot.
10. Apply Dormant Spray
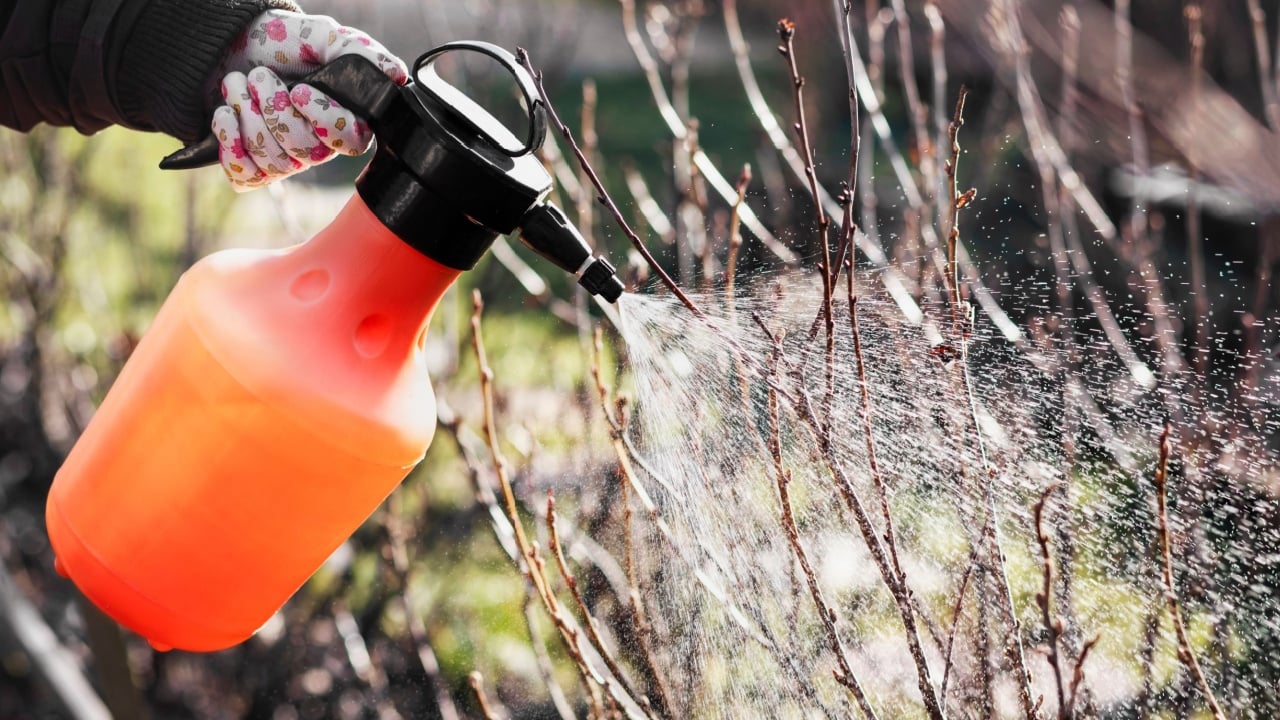
Image Credit: Shutterstock.
Pests and diseases are incredibly resilient and will happily overwinter in the crevices of bark or on fallen twigs. Applying a dormant spray, such as horticultural oil or lime sulfur, suffocates overwintering eggs, larvae, and fungal spores before they have a chance to wake up. You apply this when the plant is fully dormant and has lost its leaves, usually in late winter or very early spring, before buds swell.
It is a preemptive strike that drastically lowers the population of aphids, mites, and scale insects for the coming season. You must cover every inch of the bush, coating the branches until they are dripping, to verify that no hiding spots are missed. It is a messy job that requires a calm day, but it saves you gallons of pesticide use later in the year.
Quick Scan:
- Temperature Check: Apply when temperatures are above freezing for 24 hours.
- Coverage: Spray all surfaces, including the undersides of branches.
- Safety: Wear protective gear as sulfur and oils can be irritating.
Looking Toward the Thaw

Image Credit: Shutterstock.
Preparing your garden for the cold is labor-intensive, but walking out in spring to see live buds and healthy green stems makes every minute of effort worthwhile. Once you have completed these ten steps, your primary task shifts to observation.
Keep an eye on the weather forecast for freak warm spells or particularly brutal storms, and be ready to adjust your protections if nature throws a curveball. When the temperatures finally stabilize in spring, you will remove these layers gradually to let the plants acclimate. Until then, you can rest easy knowing you gave your bushes the best possible armor against the season.