Some people lose sleep over politics. Others get fired up over socks in sandals. And then there’s Ruth, whose decision to glue together cinder blocks for her raised garden sent half the internet into a tailspin. But while comment sections boiled over, her flower bed stood firm—literally.
Durable, budget-friendly, and surprisingly sleek, this cinder block raised garden might take a minute to win hearts, but it’ll hold soil, grow plants, and outlast the rotting wooden box you swore you’d replace three years ago.
Concrete vs Wood
Wooden raised beds look great on Day One. By Day 1,000? Not so much. Ruth’s original garden frame eventually gave up, likely bowing out in a war against moisture, bugs, and time. So she ditched splinters and sagging boards in favor of something that doesn’t care about weather reports—concrete blocks.
They don’t warp, rot, or complain. If you’re tired of gardening in a structure that looks like it’s on its last breath, it might be time to follow Ruth’s lead. Cinder blocks may not win beauty contests, but when sealed, covered, and thoughtfully laid out, they don’t even look like cinder blocks anymore.
Ready to build one people will either love or loudly complain about? Here’s how she made hers.
1. Laying the Groundwork
Before stacking blocks, Ruth leveled the area and spread out pea gravel. This kind of prep isn’t required for every garden bed—plenty of wooden ones survive on slightly uneven ground. But with concrete, it’s a different story.
Leveling matters here because it helps the structure stay stable and reduces stress on the adhesive and surface bonding cement. If the base is tilted or uneven, the blocks can shift or crack over time. For a build that’s this heavy and this permanent, starting flat makes everything easier down the line.
2. Gluing the Blocks
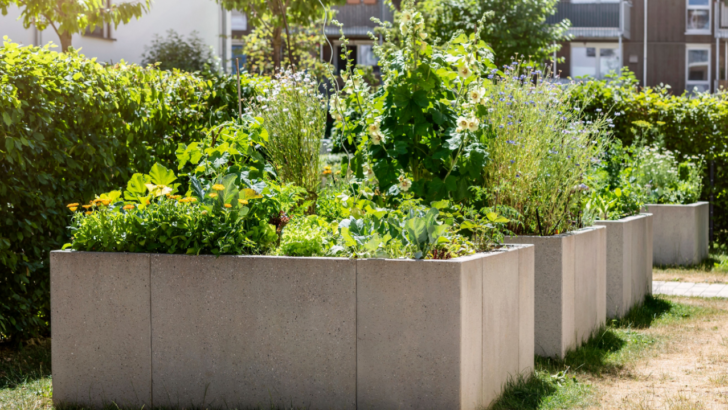
Here’s the part that sent DIY purists into a spiral: Ruth glued the blocks together. Using outdoor construction adhesive, she glued every side of every block to the next, including the second layer to the first. Her garden stands three blocks high, two rows of solid standard blocks topped with one row of cap blocks.
3. Cementing the Look
To dial down the prison-yard aesthetic, Ruth coated them in surface bonding cement. It helps to wet the blocks so they don’’t suck the moisture out of the mix too fast. You can smooth it out or rough it up with a stucco finish like she did. Either way, it covers the seams and makes it look cuter.
She then filled the top row of cap blocks with soil and planted flowers in them. The entire structure functions as one bed, a solid frame that holds soil from top to bottom.
To Use Cement Blocks or Not
Before picking a material for your raised bed, think about what you’re asking it to handle. Wood is easy to work with and looks good early on, but it tends to break down eventually, especially with constant moisture. Some people prefer natural materials, but that often means more upkeep or a shorter lifespan.
Cinder blocks are heavy, permanent, and not exactly subtle. But they don’t rot, and they’re affordable for the size and strength you get. No material checks every box. It comes down to what matters most in your space: durability, appearance, price, or how much work you’re willing to put in up front. Whatever you pick, it’s worth planning for the long run, because redoing a garden bed every few years gets old fast.
