You’ve decided to get chickens and have brought home your day-old chicks: now what? Let’s look at the basics of raising baby chicks from brooder to coop and everything in between.
Raising Baby Chicks – What Every New Owner Should Know

Initial set up and housing
All baby chicks require the same 4 elements: housing, food, water, and heat.
Learn more about things you’ll need to raise chickens.
Baby chicks housing
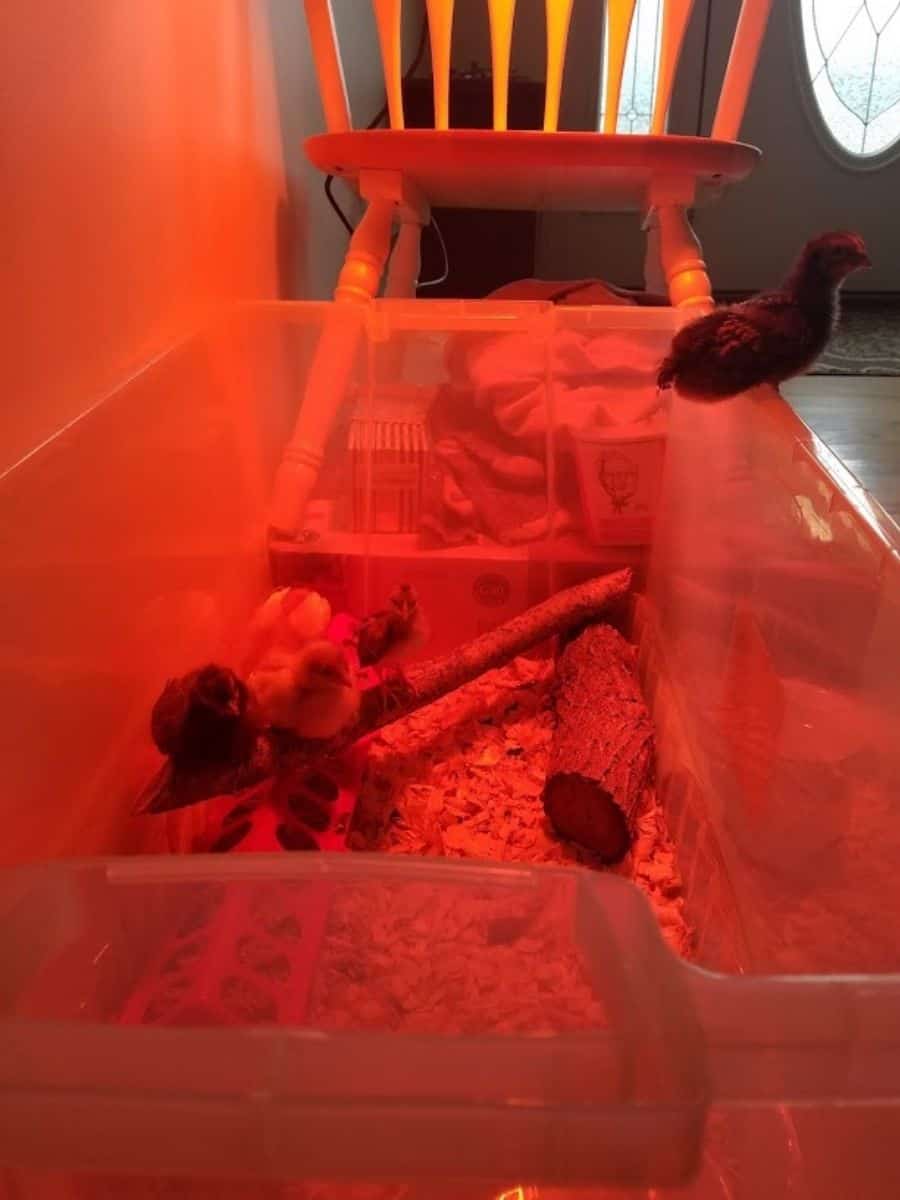
Baby chick housing, or a brooder as it is called in the chicken community, can be as simple as a 50-gallon plastic tote with a lid, or something built at home from wood and wire.
All chicken housing should be free from drafts and have a lid so that nothing can get in, and the chicks can’t get out.
Keep in mind that as your chicks grow, their space becomes smaller. So you may need to add a second tub to separate into two groups for more room to move. The brooder will need to be cleaned regularly. You will notice as they grow and become more active the more mess they will make.
Chicks starter food
Food for baby chicks consists of a small processed crumble which is easy for them to eat and digest. There are several types of feed on the market for chicks ranging from organic, non-GMO, medicated, soy-free, and everything in between. Do a bit of research on which type of food meets your preference.
There are special feeders sold specifically for chicks that are smaller and easier for them to access. These can be found in your local feed stores or online. Chicks can be really messy with their food and create a lot of wasted feed so you may want to look into some of the no-waste feeders that can be found on Amazon. There are also some really great YouTube videos on how to make one yourself.
Baby chicks waterer

Water should be available at all times. There are chick waterers on the market that are much smaller than what you would use for your grown chickens. These have smaller reservoirs so that baby chicks can’t fall into the water and drown.
Some folks will put small rocks into the waterers where the babies drink so they can have some footing should they step into the water. I like to elevate my waterer on a brick or piece of wood to prevent them from kicking bedding into it and soiling the water. Waterers should be cleaned daily and fresh water should always be accessible.
Chicks need constant heat
 Chick Brooder Heating Plate & Anti-Roost Cone Set - Warms Up to 50 Chicks - 66 Watts")
The most important of the four elements is heat. Chicks need constant heat for at least the first four weeks of their lives. As they grow their temperature requirements become less and less, but for the first week, the temp should be at 95°.
The needed temperature decreases by 5° per week until they are fully feathered. This is the rule of thumb. Depending on the time of year and your specific location, these numbers may be a bit different.
A chick will need to stay in the brooder (especially at night) until they are fully feathered. Again this will depend on the time of year and your location. If you live in southern Florida your chicks may be outdoor ready a lot sooner than someone who is raising chicks in North Dakota.
Chicks grow fast!
You will start to notice after the first week some of the primary wing feathers coming in. Other feathers will soon follow. They grow fast! And as they grow they produce dust and more waste. So as I said above the brooder will need to be cleaned quite frequently to keep waste and dust down to a manageable level.
Your chicks will also need some items in their brooder to keep them entertained. You can make a perch for them to roost on and practice for when they will eventually be moved to the outdoor coop. Place some blocks for them to hop onto to break up the monotony of being in the brooder.
Chickens are smarter than you think and need to keep their minds occupied just like we do. Boredom can cause the chicks to begin to bully or pick at one another. This could be a habit that is hard to break. Providing them with a few simple boredom busters should keep everyone happy and on their best behavior.
Transitioning your chicks to the outdoors
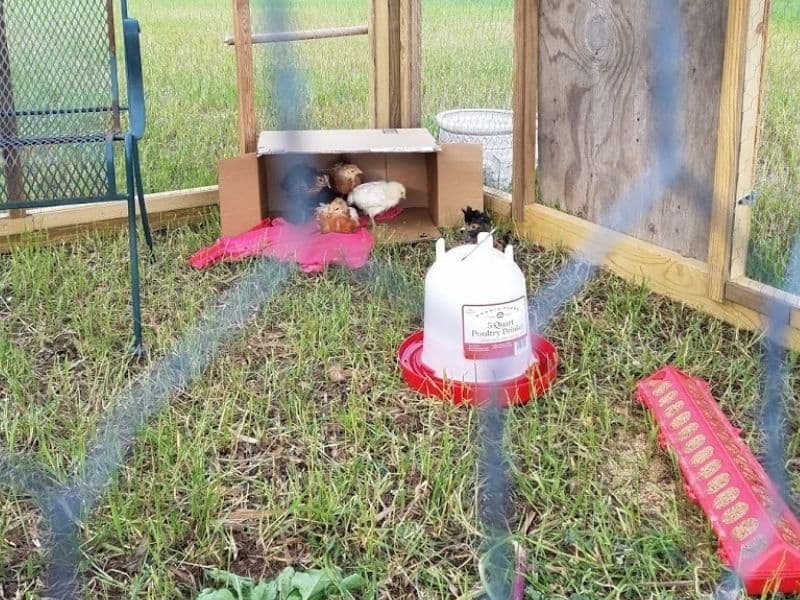
When your chicks start to feather out, usually at four to five weeks of age, you’ll want to start slowly introducing them to the outdoors.
Pick a warm and sunny day. Temps in the ’60s to ’70s are ideal. Place a wire dog crate in a spot with full sun on a grassy area and place your chicks in the crate. Make sure to bring their food and water as well.
They should acclimate fairly quickly and start to peck around and scratch in the soil. You’ll want to keep an eye on them and bring them back inside if they appear to be chilled, huddling against each other, and inactive. This is a sign that they may not be feathered enough or the outdoor temp is too cold.
A few hours a day, increasing as it gets warmer and they get older, will help make a smoother transition when you move them outside permanently.
Watch out for signs of coccidia
When your chicks are enjoying the great outdoors they will be coming into contact with bacteria and parasites that they were not exposed to while in the brooder.
While most times this helps them build up an immunity or resistance to these things, there is one intestinal parasite that can be deadly to young chickens. Coccidia is an intestinal parasite that is found in most soils and can be transmitted through the feces of an infected bird.
There are medicated chick feeds on the market that contains Amprolium which may help prevent coccidiosis. Some folks like to start their chicks on a medicated feed for this reason. Do a bit of research and decide what will work best for you and your flock.
Most chickens do carry a coccidia load in their intestines which is manageable. The young birds are usually the ones that are most susceptible because they have not yet built up a resistance. Wet soil harbors the parasite, so if at all possible put your chicks out on dry ground while they are acclimating.
You’ll need to continue to bring your chicks back inside in the evenings until they are fully feathered and able to handle the cooler, evening temperatures. I generally brood my chicks till 8-10 weeks of age depending on the time of year.
If brooding in the summer they can typically fully transition earlier than in the spring or fall. Keep an eye on your birds. The more time you spend with them, the more you’ll be able to determine if they are cold and need just a bit more time indoors.
Integrating your chicks into your existing flock
When your chicks are ready to go outside and join the flock you’ll need to take precautions when introducing your babies to your grown birds. Your existing flock will have already established a pecking order and hierarchy, and your new chicks will be at the bottom of the totem pole.
The integration process should be slow and cautionary.
I like to place my young birds in a wire crate inside the coop with food and water and let them get used to the older birds without them being able to actually touch each other. This way your older birds can get used to the new additions and start to accept them into the flock.
This can take a week or more to be successful. After a week if everyone seems to be doing ok and generally looks to be accepting of each other you’ll want to open the door of the wire crate and stand back. Observe what goes on. Most likely your young birds will stay in the crate and the older birds will come in, to peck around at any bits of feed that might be in the crate. This is totally normal.
If you see that your older birds are ganging up on the younger ones, shoo them out and shut the door. Try again later. This method works, but again it may take more time. Once your flock has been integrated you can start dreaming about the next breed of chicks you’ll raise when chick season inevitably comes around again. Chicken math is a real thing!
By following these steps you should have a happy, healthy flock that will bring you joy, and breakfast, for years to come.
FAQ’s
What if I have different ages of chicks? Can I brood them all together?
If they are only a few days to a week apart, yes. They should be fine. You wouldn’t want to mix 3-4 week old chicks with newly hatched chicks as the younger ones could get trampled, smothered, or bullied by the older chicks.
When I put my chicks in the coop for the first time will I need to keep them locked up for a while or will they know to go up at night on their own?
If you have a run attached to your coop they will be fine to be out in the run during the day. You may have to pick them up and place them in the coop in the evenings until they realize that they are supposed to go up at night. It usually takes less than a week for them to start going up on their own.
If you plan to free-range them and do not have an attached run, you’ll want to keep them in the coop for about two weeks until they really know where their home is.
Is medicated feed better than the non medicated?
It really is a personal preference. The medicated feed contains Amprolium which may help reduce susceptibility to coccidiosis. Folks who live in areas where coccidia is more present may choose to start out on the medicated feed as a precaution. I personally do not treat my birds unless there is a problem.
When will my chicks start to lay eggs?
This really depends on the breed or type of chicken. Your heavy egg layers such as Leghorns, Golden Comets, Sexlinks, Rhode Island Reds, and Australorps will typically begin laying eggs as early as 16-17 weeks.
Heritage breed chickens take longer to begin. Sometimes six to eight months of age or longer.
What is pasty butt?
Pasty butt is a condition in young chicks where feces backs up and hardens around the vent preventing them from being able to eliminate waste. This is generally caused by stress and/or overeating too early. Also, cold temps can bring on the pasty butt.
It is easily taken care of by gently massaging the dried feces off of the chick with a warm, wet washcloth or paper towel. You’ll want to be super gentle so as not to rip the delicate skin on their backside. After removing all the feces and exposing the vent you’ll want to dry the chick off. This can be done with a towel or a hairdryer set on low. You will want to monitor the chick for the next few days to make sure that pasty butt does not reoccur. After 3-4 days with a clean backend, you should be in the clear.