
Creating a pet-friendly home doesn’t always require expensive renovations or professional help. All you need is to get your creative juices flowing and a weekend of DIY enthusiasm, and you can transform your living space into a haven for your furry friends.
According to the American Pet Products Association (APPA), about 94 million U.S. households (around 71 %) now own at least one pet. However, many homes aren’t optimized for your four-legged companions. These thoughtful DIY projects will help you create functional, stylish solutions that benefit both you and your pets while staying within budget.
Where We Got This Data From
The information in this article is based on recent reports, veterinary research, and trusted animal care guidelines. All details were reviewed to ensure accuracy and reliability for everyday pet owners.
1. Hidden Litter Box Cabinet
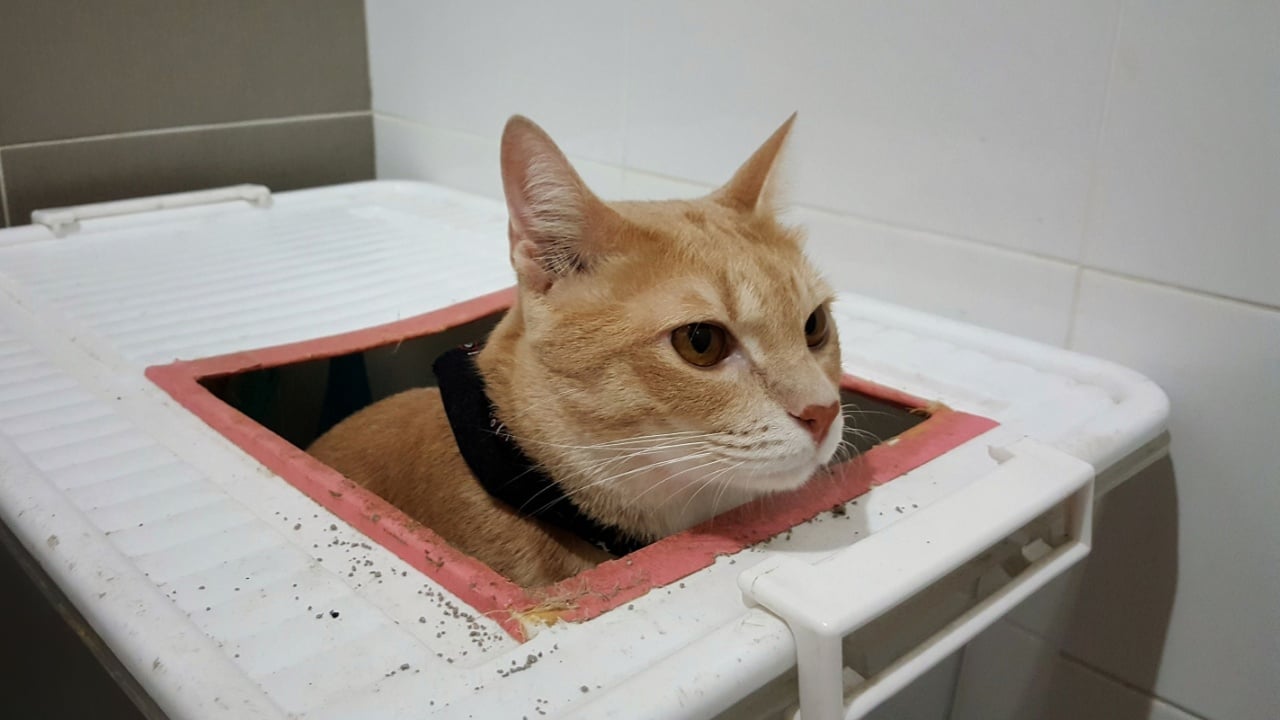
Image Credit: Shutterstock.com.
Transform an old cabinet or side table into a discreet litter-box station. Cut a cat-sized entrance and a hinged side door for cleaning access. Line the interior with waterproof material to guard against moisture, add ventilation holes near the top for airflow, and consider a battery-powered LED strip for night use.
Quick Tips
- Measure your cat from nose to tail base to ensure enough interior space (ideal box size is at least 1.5× that length).
- Use a fine-tooth jigsaw for clean cuts and sand edges smooth.
- Optional: install a small exhaust fan to control odours.
2. Cozy Window Perch
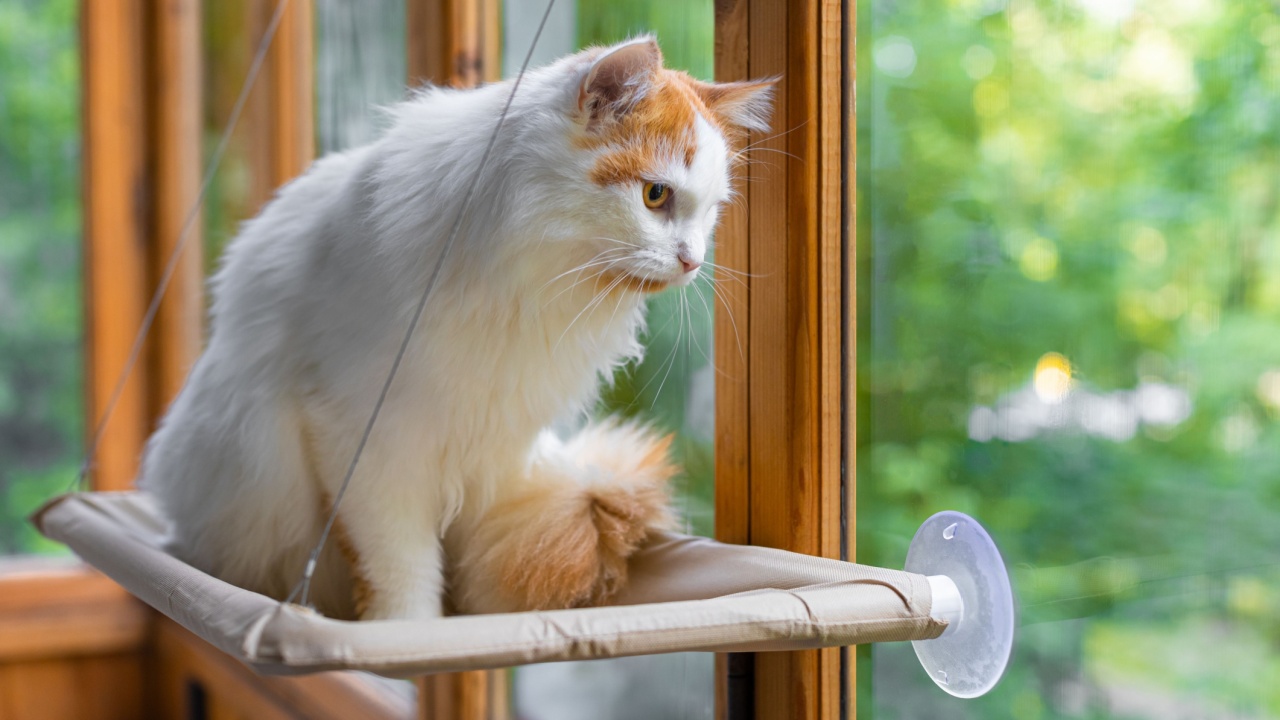
Image Credit: Shutterstock.com.
Construct the perfect bird-watching station using wooden brackets, plywood, and soft cushioning. This elevated perch satisfies your cat’s instinct to survey their territory while providing hours of entertainment watching outdoor activities.
Mount sturdy L-brackets directly into wall studs to support up to 25 pounds safely. Cut a piece of plywood to your desired size, sand it smooth, and cover it with weather-resistant fabric. Add a removable cushion with a washable cover for easy maintenance. The elevated position also helps keep cats away from radiators and heating vents during the winter months.
Quick Tips:
- Use wall anchors rated for at least 50 pounds
- Position 18-24 inches from the floor for easy access
- Add non-slip padding underneath the cushion
- Consider a wraparound design for corner windows
3. Raised Feeding Station with Storage

Image Credit: Shutterstock.com.
Elevating feeding bowls can improve ergonomics for some pets, especially older or large dogs, but evidence is mixed regarding health risks. Some research links raised feeders with a higher risk of gastric dilatation-volvulus (GDV) (doggy heartburn) in large breeds. Consult your veterinarian if you care for a large- or giant-breed dog.
If you proceed: Use a wooden crate or small bookshelf as your base, cutting circles to accommodate your pet’s bowls. Sand the holes smooth and apply a food-safe finish. Install a pull-out drawer underneath using simple drawer slides to store kibble, treats, and feeding accessories. The raised height should position the food bowls at your pet’s chest level when standing naturally.
Quick Tips:
- Measure bowl diameter before cutting holes
- Use stainless steel or ceramic bowls to prevent bacterial growth
- Apply multiple coats of food-safe polyurethane
- Add rubber feet to prevent sliding during meals
4. Custom Pet Gate
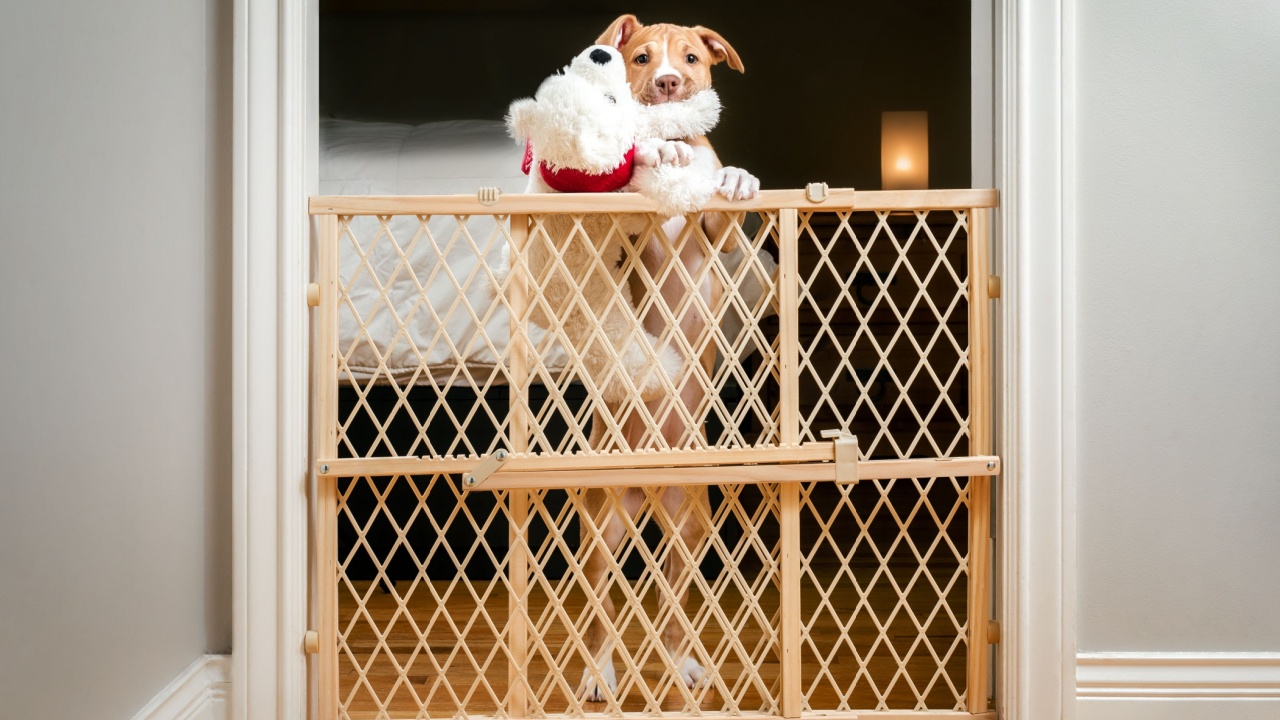
Image Credit: Shutterstock.com.
Add an attractive barrier that complements your home’s decor while keeping pets safely contained in designated areas. Unlike commercial gates that look institutional, custom gates can match your existing woodwork and architectural style.
Build a frame using lumber and fill it with vertical slats spaced appropriately for your pet’s size. Install heavy-duty hinges and a child-proof latch for security. Consider making it foldable for easy storage or removable if you only need temporary barriers.
Quick Tips:
- Measure the opening width at multiple points for accuracy
- Use a tension-mount system for rentals
- Sand all surfaces smooth to prevent splinters
- Test the latch mechanism before final installation
5. Multi-Level Cat Climbing Wall
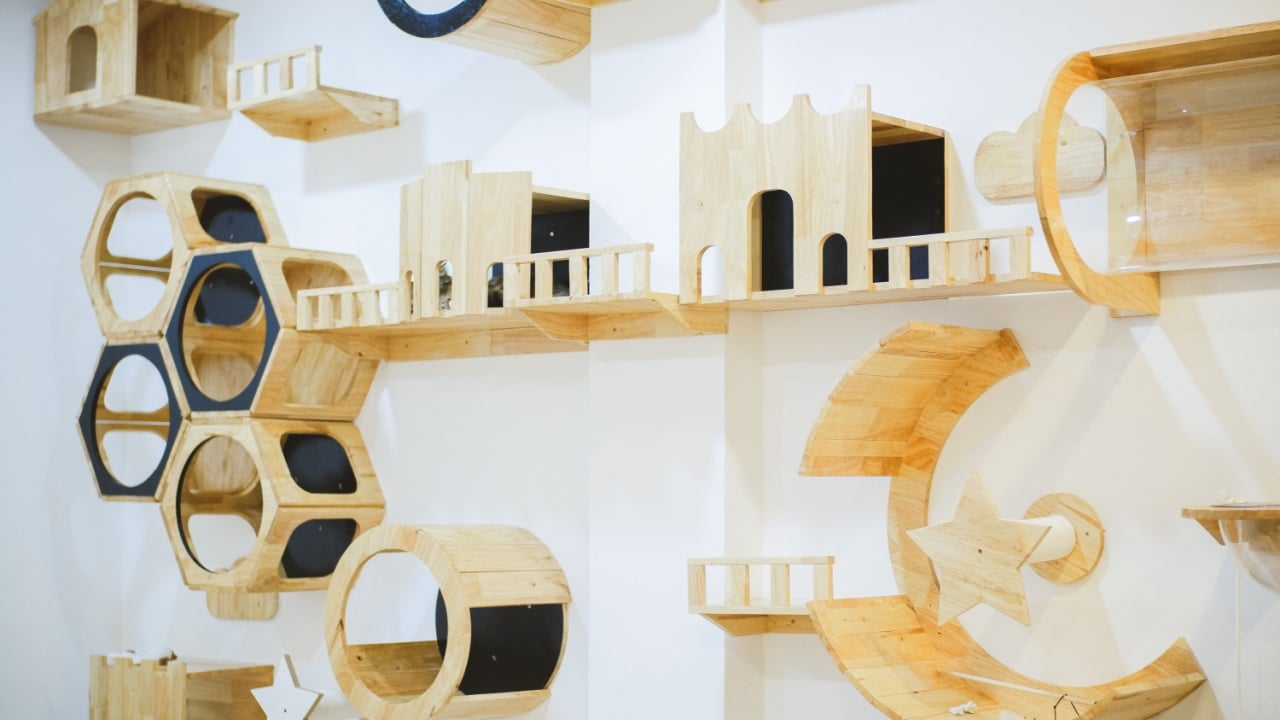
Image Credit: Shutterstock.com.
Convert vertical wall space into an adventure playground that provides exercise and fun for indoor cats. This project mimics trees and high perches that cats naturally seek in outdoor environments.
Install a series of floating shelves, bridges, and platforms at varying heights using heavy-duty brackets mounted into wall studs. Cover platforms with carpet remnants or sisal rope for traction. Create pathways between levels using wooden planks wrapped in carpet or rope. Include at least one enclosed hideaway box for cats who prefer enclosed spaces during play.
Quick Tips:
- Plan the layout on paper first
- Install lower platforms first and work upward
- Leave 12-18 inches between levels for easy jumping
- Use wall anchors rated for 75+ pounds per bracket
6. Wall-Mounted Toy Organization System
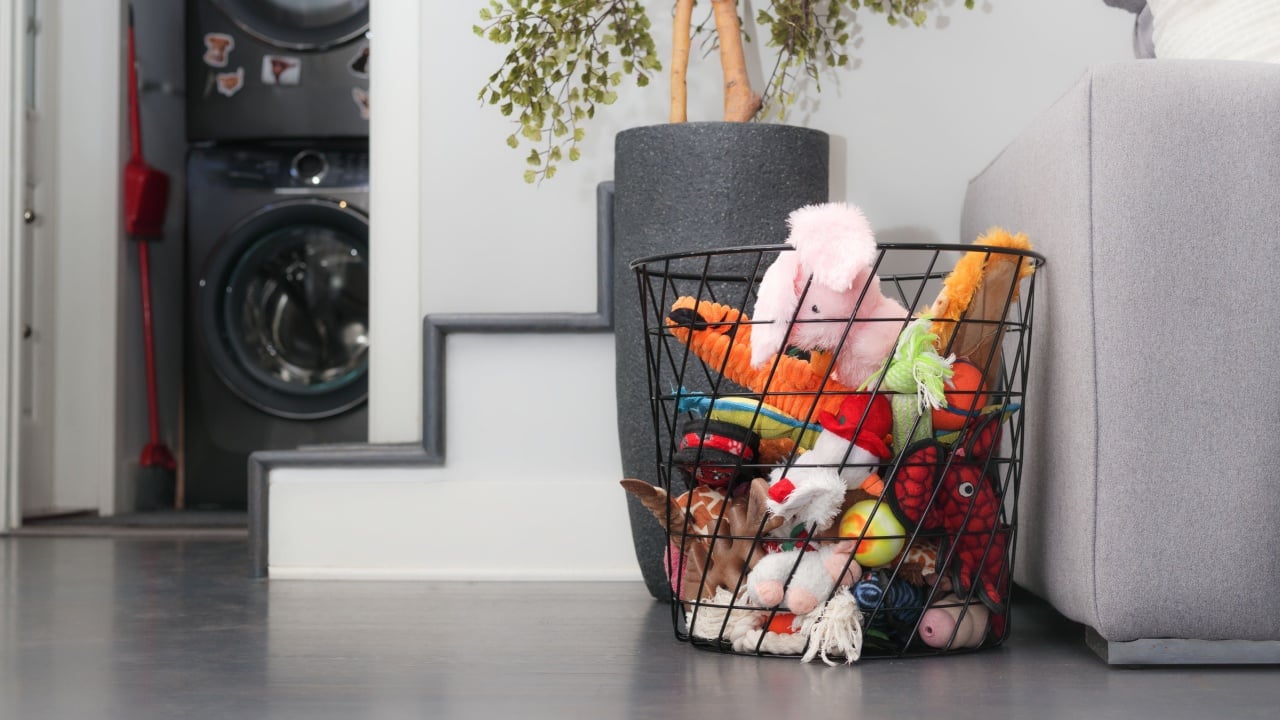
Image Credit: Shutterstock.com.
Remove scattered pet toys throughout your home with an attractive wall storage solution that keeps everything accessible but tidy.
Build a grid of compartments using plywood and 1×2 lumber, sizing each section for different toy types. Include hooks for leashes and harnesses, a small shelf for treats, and a basket for frequently used items. Mount the entire unit at an accessible height and finish with paint or stain that matches your existing decor.
Quick Tips:
- Use rounded corners to prevent injury during play
- Install at an adult height to keep small toys away from children
- Include a “dirty toy” section with a washable lining
- Add labels for easy organization
7. Folding Pet Ramp
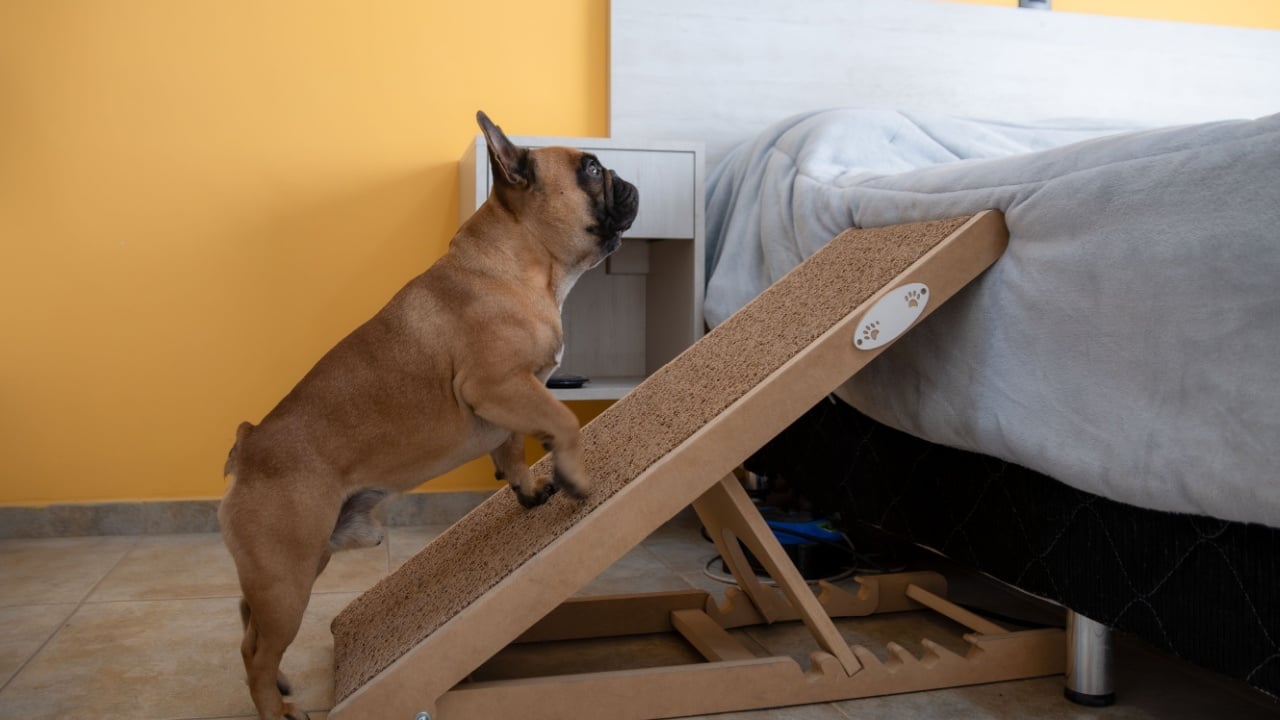
Image Credit: Shutterstock.com.
Create a space-saving solution for older pets or small breeds who struggle with stairs or high furniture. This adjustable ramp folds flat for storage and can be positioned at various angles depending on your needs.
Construct the ramp using plywood with support ribs underneath for strength. Add hinges at the midpoint to create the folding mechanism. Cover the surface with outdoor carpeting or rubber matting for traction, and install safety rails on both sides. The ideal angle should not exceed 30 degrees for most pets.
Quick Tips:
- Test the weight capacity with something heavier than your pet
- Use marine-grade plywood for moisture resistance
- Add a locking mechanism to prevent accidental folding
- Store vertically in a closet or behind furniture
8. Outdoor Pet Washing Station
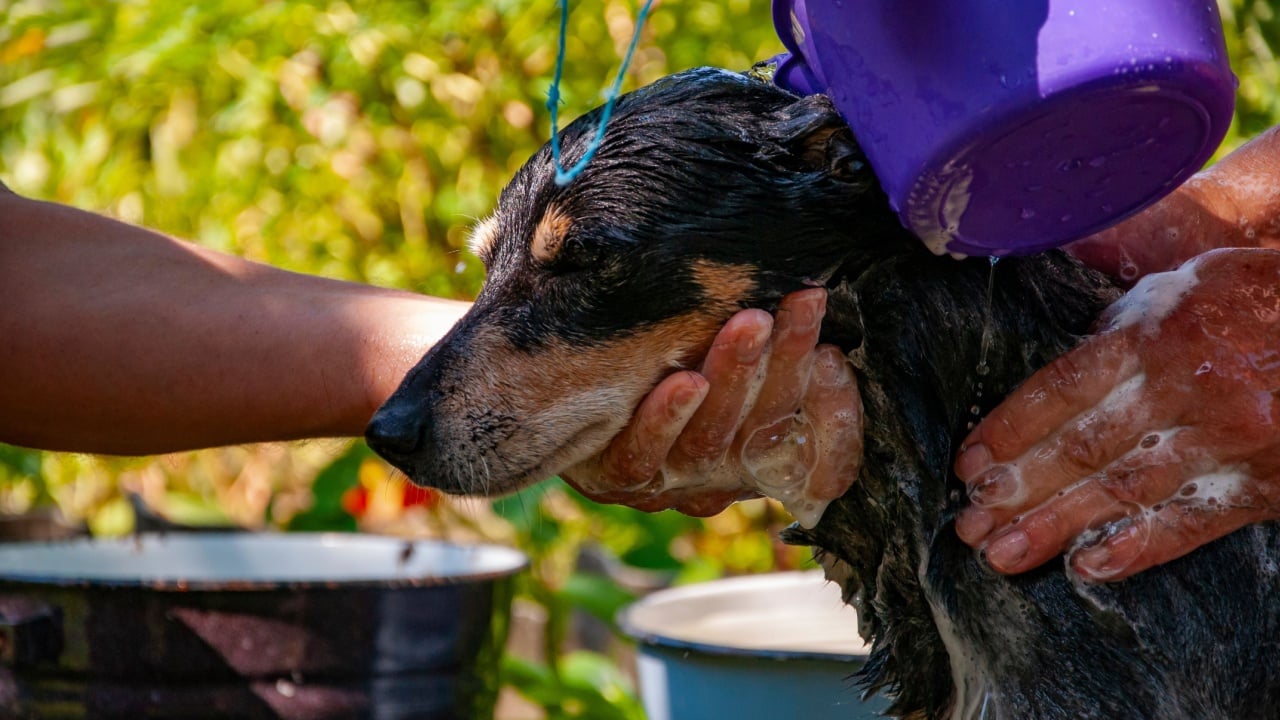
Image Credit: Shutterstock.com.
Set up a cleaning zone that makes bath time easier while keeping mess contained outdoors. This station works particularly well for muddy paws, post-walk cleanups, or full baths during warmer months.
Install a utility sink or use a large plastic tub on a raised platform. Create splash guards using PVC pipe and shower curtains or clear plastic sheets. Add a handheld sprayer attachment and non-slip matting for safety. Include storage for towels, shampoo, and other supplies in weatherproof containers.
Quick Tips:
- Ensure proper drainage to prevent standing water
- Use warm water connections for comfortable bathing
- Install adequate lighting for evening use
- Consider a movable design for seasonal storage
9. Under-Stairs Pet Hideaway

Image Credit: Shutterstock.com.
Transform wasted space under stairways into a cozy retreat that gives pets their own private den. This project maximizes unused square footage while creating a quiet sanctuary for relaxation.
Frame out the space with 2×4 lumber and install drywall or plywood walls. Add proper ventilation, electrical for lighting, and an access door sized appropriately for your pet. Include washable cushions, a water bowl, and toy storage. Consider adding a small window or skylight if possible, to prevent the space from feeling too enclosed.
Quick Tips:
- Check building codes for under-stair modifications
- Install moisture barriers to prevent dampness
- Use low-voltage LED lighting for safety
- Make the entrance wide enough for comfortable access
10. Pet-Friendly Mudroom Station
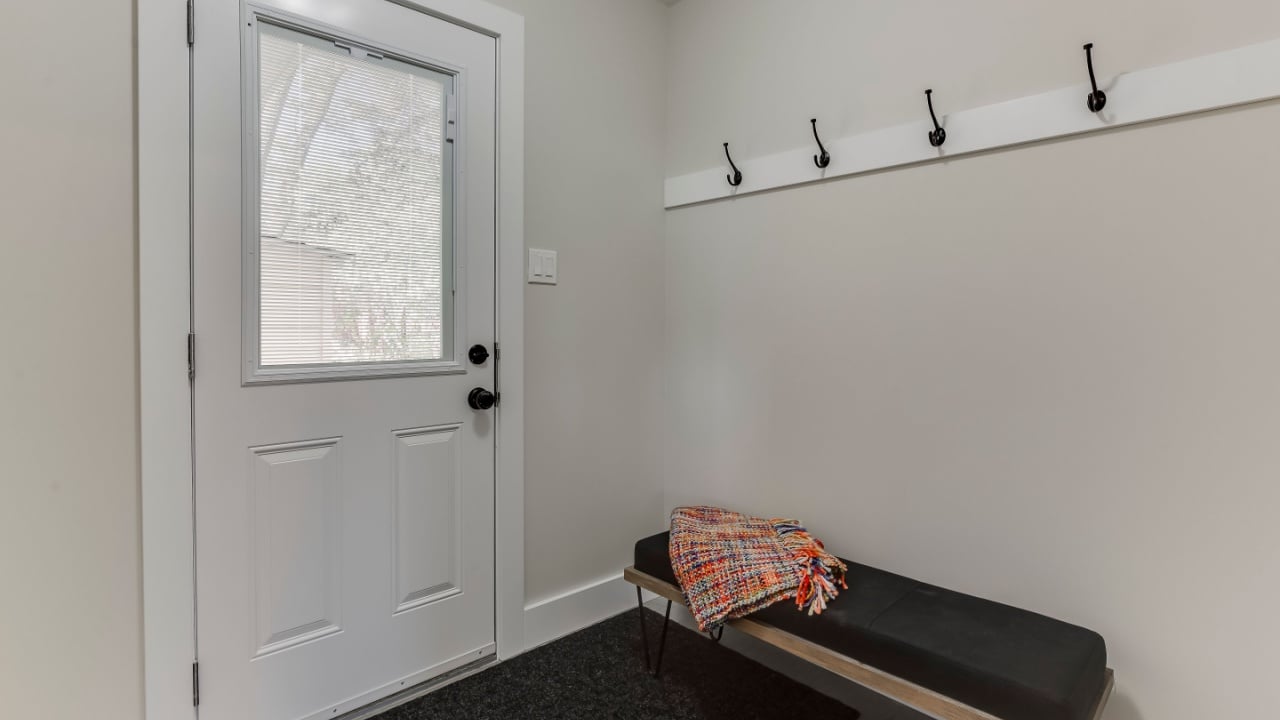
Image Credit: Shutterstock.com.
Create an organized entry system that handles pet gear, outdoor equipment, and daily cleanup routines. Build cubbies for each family member and pet, including hooks for leashes, shelves for shoes and boots, and a bench for putting on footwear. Add a tile or vinyl floor area that’s easy to clean, and install a utility sink for washing muddy paws. Include storage for towels, pet wipes, and seasonal gear.
Quick Tips:
- Use water-resistant materials throughout
- Install hooks at appropriate heights for different users
- Include a floor drain if possible
- Consider heated flooring for winter comfort
11. Window-Seat Feeding Area
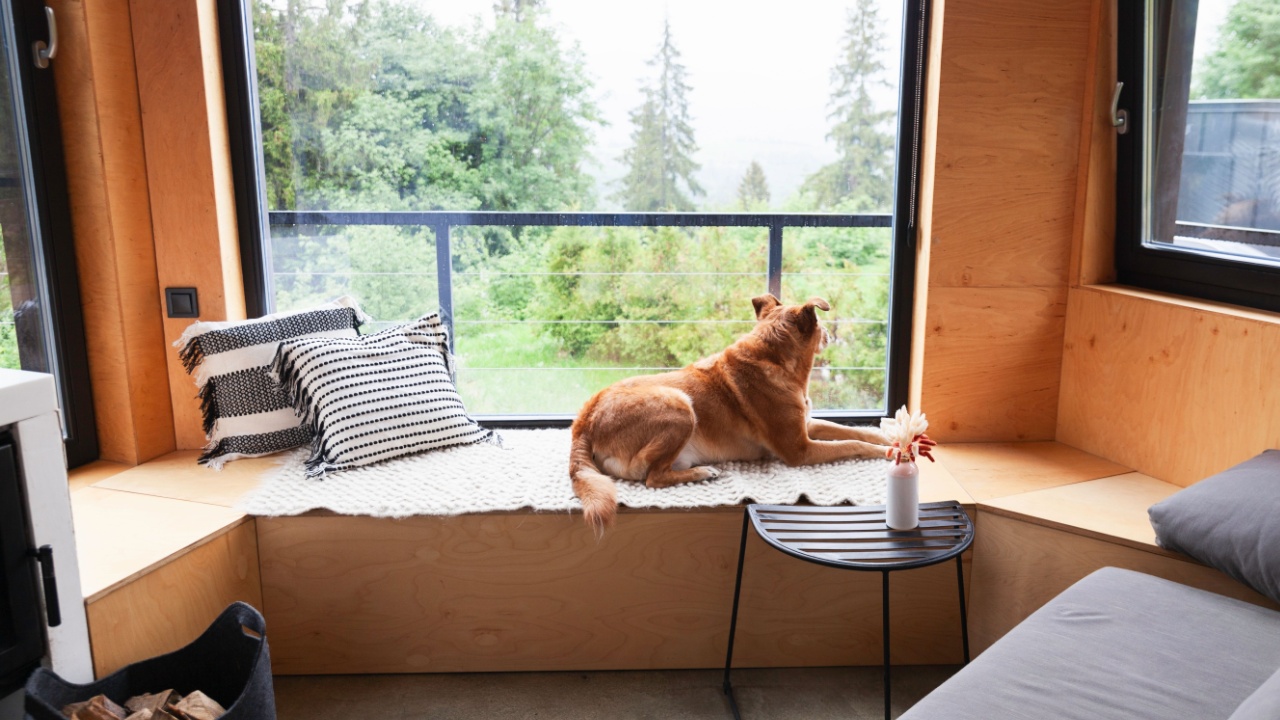
Image Credit: Shutterstock.com.
Combine a sunny dining spot with storage functionality by converting or building a window seat that accommodates pet feeding equipment.
Build a bench-style seat with a hinged top for storage access. Cut recessed areas in the top surface to hold food and water bowls securely. Add a splash guard along the window and use water-resistant finishes throughout. Include cushions that can be easily removed for cleaning.
Quick Tips:
- Position bowls away from the window to prevent spills on the glass
- Use marine-grade hardware for durability
- Install proper ventilation to prevent moisture buildup
- Consider adding a small towel storage area nearby
12. Fold-Down Grooming Table
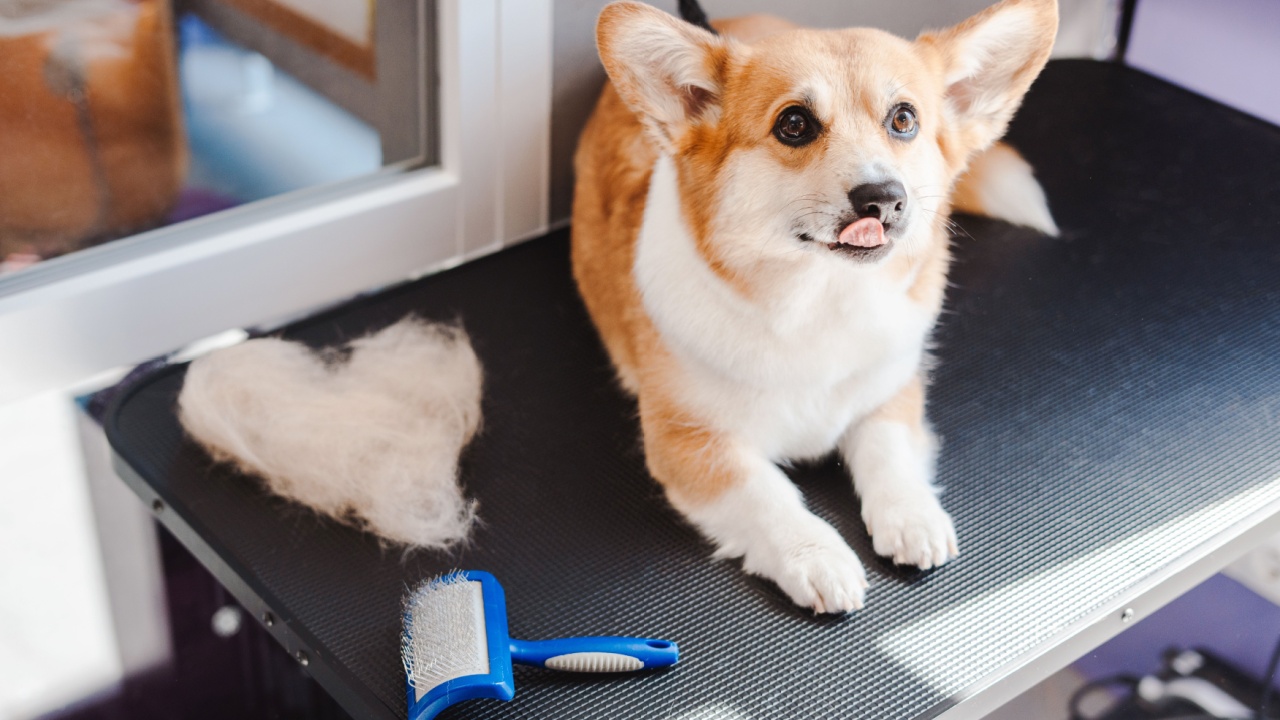
Image Credit: Shutterstock.com.
Create a space-saving grooming station that provides a secure, comfortable area for regular pet maintenance. This wall-mounted table folds flat when not in use, making it perfect for smaller homes or multi-purpose rooms.
Mount heavy-duty wall brackets that can support your pet’s weight plus grooming equipment. Build a hinged table surface with non-slip padding and safety restraints. Include storage for brushes, nail clippers, and other grooming supplies. Add adequate task lighting and consider installing a small sink nearby if space allows.
Quick Tips:
- Test the weight capacity before use with pets
- Include multiple restraint points for safety
- Use rounded corners to prevent injury
- Install at a comfortable working height for the user
13. Smart Pet Monitoring System
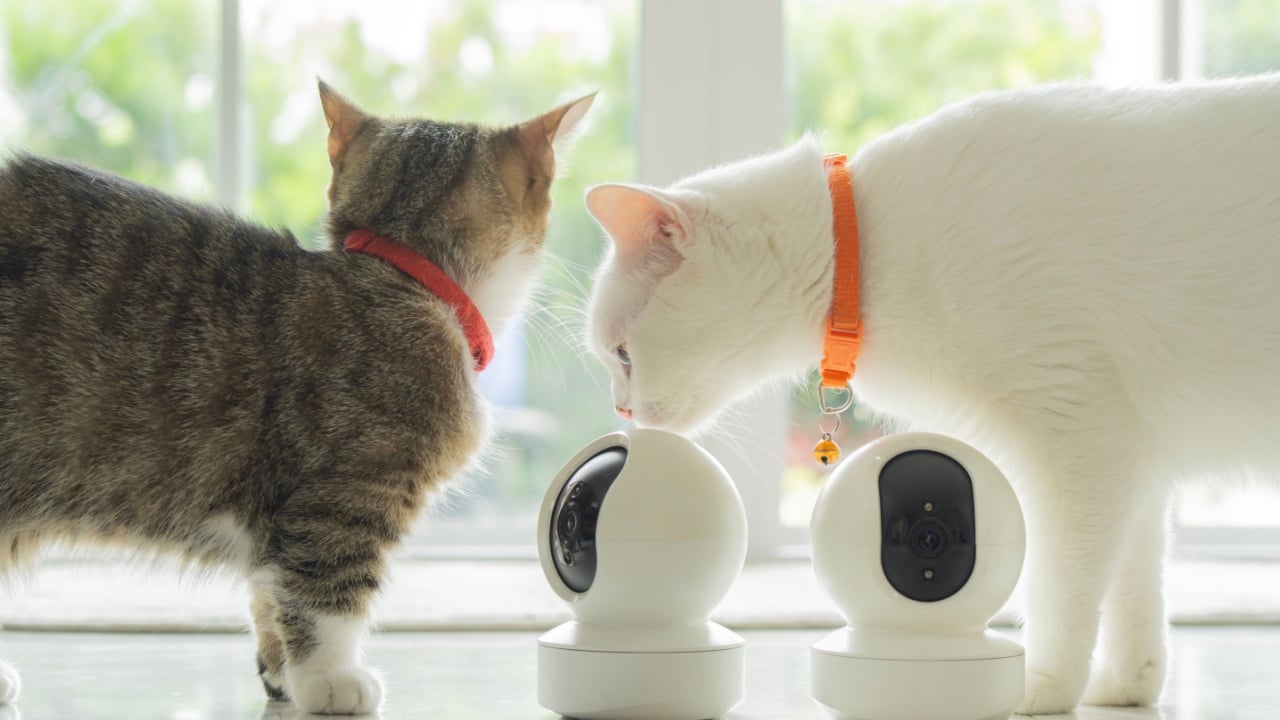
Image Credit: Shutterstock.com.
Make a DIY surveillance system using basic electronics and smartphone technology to keep tabs on pets while away from home. This project provides peace of mind and helps identify behavioral patterns or issues.
Mount an old smartphone or tablet in a protective case at pet height, connect to your home Wi-Fi network, and use video calling apps for live monitoring. Add motion sensors to trigger recording and two-way audio for communication. Include backup power options and secure mounting to prevent tampering.
Quick Tips:
- Use devices you already own to reduce costs
- Position cameras to cover main activity areas
- Test audio quality before finalizing installation
- Consider privacy implications and inform family members
14. Pet-Safe Garden Area
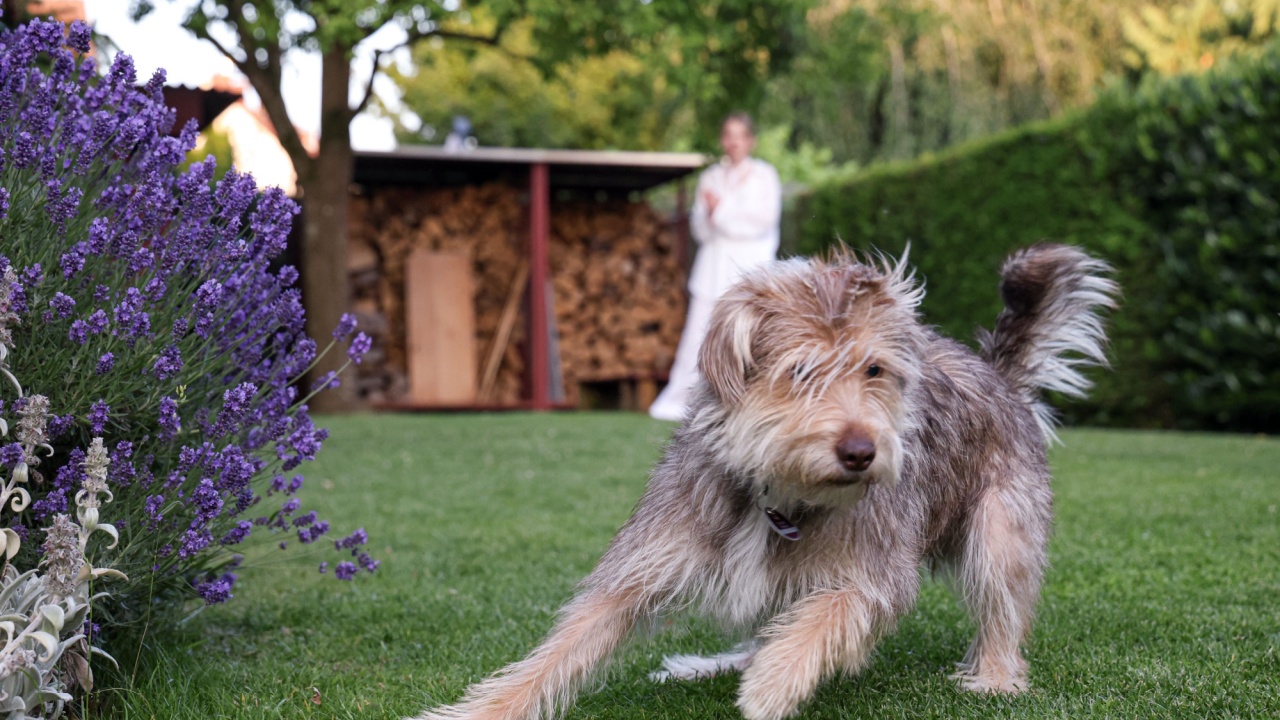
Image Credit: Shutterstock.com.
Design an outdoor space both decorative and safe for your pets. Use raised beds planted with pet-safe herbs like catnip and cat grass. Install secure fencing to prevent escape and protect against outdoor hazards. Add shaded zones, fresh water stations, and clear pathways for maintenance and pet movement.
Always check plants against the American Society for the Prevention of Cruelty to Animals (ASPCA) toxic plant list before planting.
Quick Tips:
- Research all plants thoroughly before installation
- Use organic growing methods to avoid chemical exposure
- Install secure gates with pet-proof latches
- Consider seasonal plant rotation for year-round interest
Be Mindful of the Little and Big Things

Image Credit: Shutterstock.com.
Making your house pet-friendly is a journey, not a destination. As your pets grow and your family changes, your home can adapt too.
Start with the projects that solve your biggest headaches, then slowly add more features to make life easier and more fun for everyone. The goal is to create a space that works for both people and pets without sacrificing style.