Have you ever peered into the depths of your smoothie maker and wondered if a new civilization might be forming under the blades? That morning, green juice seemed like a brilliant idea at 7 AM. However, by evening, the crusty remnants of kale and chia seeds have cemented themselves to the glass with an adhesive strength that rivals industrial glue. Ignoring the situation only makes the cleanup harder later.
Leaving dirty appliances on the counter creates clutter and encourages bacteria growth. You want your kitchen tools ready for action whenever hunger strikes, not waiting in a queue for a deep scrub. A sparkling machine performs better and smells significantly fresher.
Here is how to restore your bender to health-inspector quality.
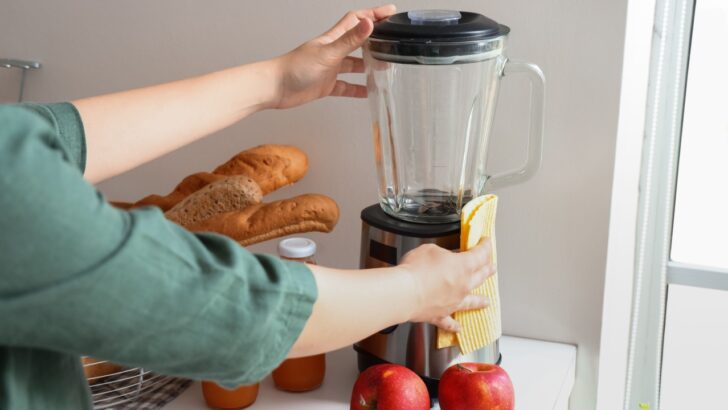
1. Unplug and Disassemble the Blender
Image Credit: Shutterstock.
Safety comes first. Before you even look at a sponge, remove the plug from the wall socket. It seems obvious, yet many people skip this precaution. Accidentally bumping the “pulse” button while your fingers are near the blades leads to a disaster nobody wants to experience. Severing power eliminates that risk entirely.
Once the machine is dead to the world, take it apart. Do not try to wash the whole unit as one piece. Most standard blenders consist of a few distinct components: the lid, the jar (or pitcher), the blade assembly, the locking ring, and the rubber gasket. Separating these pieces is vital. The rubber gasket, that little ring sitting between the blade and the jar, is the primary culprit for trapped gunk. Liquids seep underneath it during operation. If you never remove it, mold will eventually grow in that dark, damp crevice.
2. Soak All Removable Parts in Warm Soapy Water

Image Credit: Shutterstock.
Scrubbing dried food requires unnecessary elbow grease. Let chemistry do the heavy lifting for you. Fill your sink or a large basin with warm or hot water and add a generous squeeze of dish soap. Submerge the lid, jar, locking ring, blade assembly, and gasket. Allowing these items to soak for fifteen to twenty minutes makes a massive difference (just don’t forget and leave it all day, as this can be hard on the blade). The warm water rehydrates dried fruit sugars and vegetable fibers, while the soap breaks down oils and fats from ingredients like peanut butter or yogurt.
While the parts swim in the suds, pay attention to the blades. Food often gets stuck right where the metal meets the plastic or directly under the cutting wings. Soaking softens this residue, making it easier to dislodge later. Be careful when reaching into the water. Those blades are sharp, and soapy water decreases visibility. You do not want to grab the sharp edge by mistake.
3. Wipe Down the Blender Base With a Damp Cloth

Image Credit: Shutterstock.
The motor base often gets neglected. It sits on the counter collecting dust, spills, and sticky drips that run down the side of the pitcher. However, you cannot submerge this part in water. The base houses the electric motor, and water inside the casing will ruin the appliance permanently or cause a short circuit.
Take a soft cloth or a sponge and wet it with warm, soapy water. Wring it out well so it is damp, not dripping. You want to clean the surface, not flood it. Wipe the entire exterior of the base. Pay close attention to the buttons, dials, and switches. Grime loves to accumulate in the tiny gaps around control knobs. If your cloth cannot reach those tight spaces, use a cotton swab dipped in rubbing alcohol or soapy water to trace the edges.
4. Fill the Jar With Hot Water, Vinegar, and Baking Soda
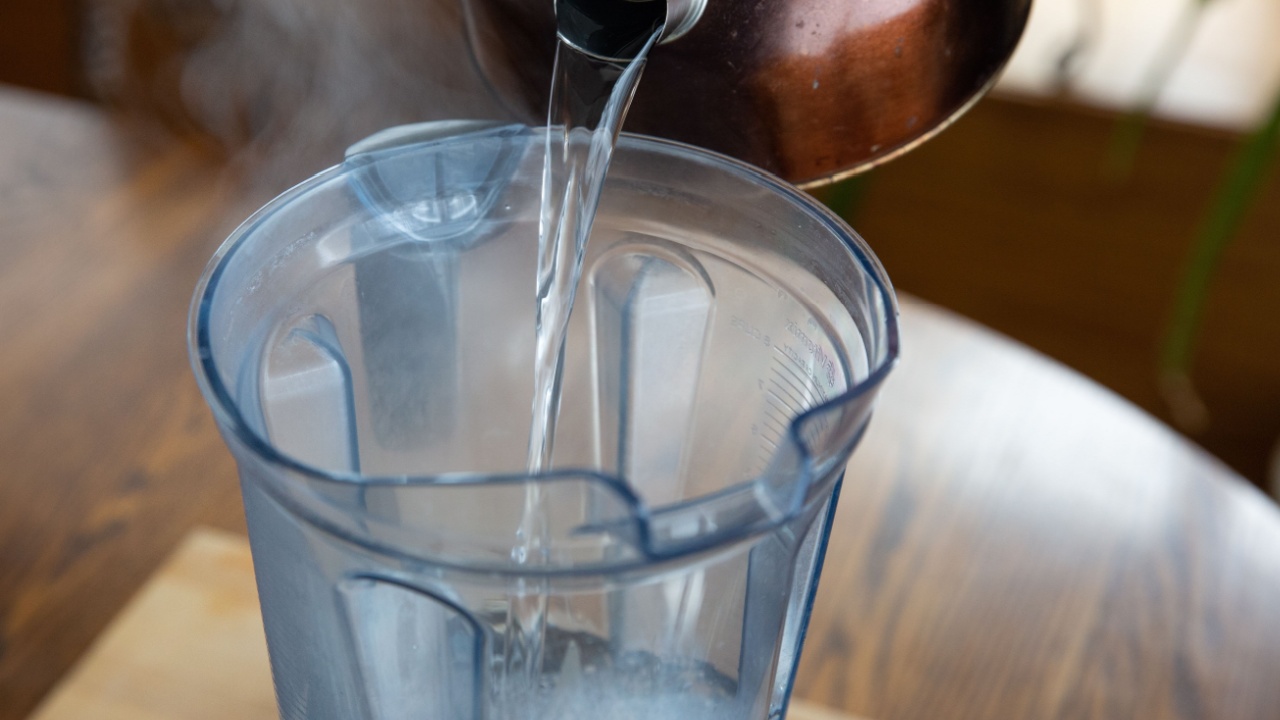
Image Credit: Shutterstock.
Sometimes, scrubbing is not enough to remove lingering odors or cloudiness from the jar. Plastic pitchers, in particular, tend to absorb smells from potent ingredients like garlic or onions. To tackle this, you can utilize the fizzing reaction of baking soda and vinegar.
Reassemble the blade and gasket onto the jar. You need the container to hold liquid again. Pour in one cup of hot water (not boiling, just hot from the tap). Add a splash of white vinegar and a tablespoon of baking soda. The mixture will fizz immediately (but it also means these two items are slowly neutralizing each other). This is normal and helpful. Place the lid on the jar securely. Put the jar back on the base and plug the unit in. Turn the blender on and run it on a high setting for ten to thirty seconds.
5. Rinse, Dry, and Reassemble
Image Credit: Shutterstock.
Pour the foamy, dirty water down the sink. Rinse every component, lid, jar, gasket, and blades under fresh, running water to remove any traces of soap, vinegar, or baking soda. You want your next strawberry banana shake to taste like fruit, not salad dressing.
Drying represents the final and most critical phase. Moisture is the enemy of a stored appliance. If you reassemble a wet blender, you invite mildew to return immediately. Take a clean dish towel and dry each piece by hand. After towel drying, leave the parts disassembled on a drying rack or a clean cloth on the counter for a while. Air drying guarantees that any hidden droplets in the threading or the gasket groove evaporate completely.
Keeping Your Blender in Top Shape

Image Credit: Shutterstock.
Maintaining this level of cleanliness does not require a deep clean every single day. For daily maintenance, a quick rinse with hot water immediately after use prevents food from drying in the first place. This simple habit saves you from scrubbing dried spinach later. If your blades look dull or the motor sounds like it struggles, check the manufacturer’s guide regarding replacement parts. Sometimes a clean blender still performs poorly because the mechanical parts have worn out. Remember to unplug when they are not in use.