As the vibrant colors of your summer garden begin to fade and a crispness fills the air, it’s time to think about preparing your beds for the coming winter. While many plants are hardy enough to withstand the cold, some of your most beautiful flowering bulbs need a little help to survive. These tender bulbs, often native to warmer climates, can be damaged or killed by freezing temperatures and wet winter soil.
Lifting, or digging up, these bulbs in the fall is a crucial step to ensure they return with spectacular blooms next year. This process, known as overwintering, protects your investment and rewards you with bigger, better flowers season after season. It’s a simple act of garden care that allows you to enjoy exotic and stunning plants far beyond their natural growing zones. This guide will walk you through which bulbs to dig up, how to do it, and the best way to store them until it’s time to plant again in the spring.
1. Dahlias (Dahlia spp.)

Image Credit: Depositphotos.com.
Dahlias are the showstoppers of the late summer garden, producing an incredible array of colors, sizes, and forms. Because they are native to Mexico, their tuberous roots are not equipped to handle frozen ground. Leaving them in the soil in any climate colder than USDA zone 8 almost guarantees they will rot or freeze, meaning you’ll lose the plant entirely. Digging them up preserves the tubers so you can enjoy their magnificent blooms for years.
After the first light frost has blackened the foliage, it’s time to act. This signals that the plant has stored all its energy for the winter. Cut the stalks down to about 4-6 inches. Use a garden fork to carefully loosen the soil in a wide circle around the base of the plant, being cautious not to pierce the delicate tubers. Gently lift the entire clump from the ground. Brush off the excess soil, but do not wash the tubers, as excess moisture can lead to rot in storage. Allow them to cure in a dry, well-ventilated area for a few days before storing them for the winter.
Dahlia Care Summary
- When to Dig: After the first frost, when the foliage has turned black.
- How to Dig: Cut Dahlia stems to 6 inches, then use a fork to gently lift the tuber clump.
- Storage Prep: Brush off loose soil and let the tubers cure in a dry, airy place for several days.
2. Gladiolus (Gladiolus spp.)
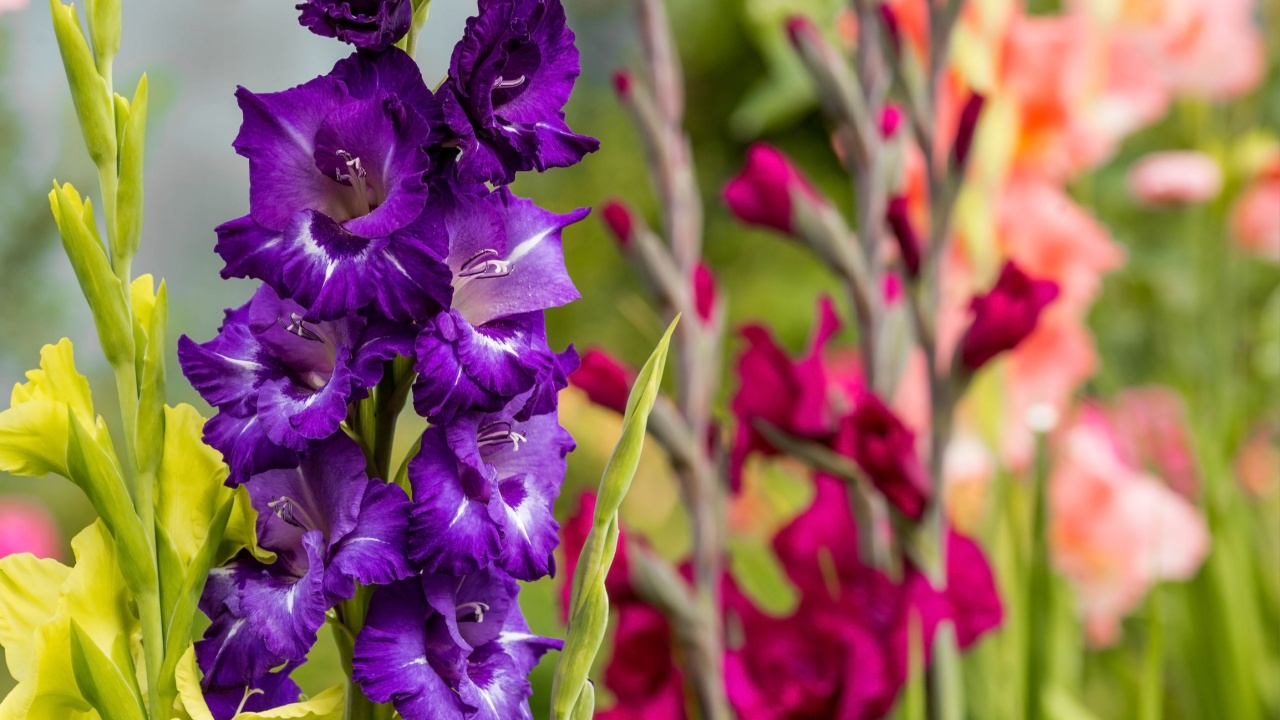
Image Credit: Shutterstock.com.
Known as Sword Lilies, Gladioli produce elegant, tall spikes of flowers that are perfect for cutting. Most varieties are only hardy in USDA zones 8 and above, making them prime candidates for overwintering in colder regions. Their underground structures are technically corms, which are susceptible to freezing and rotting in cold, damp winter soil.
Wait until the foliage has yellowed and died back, typically about six weeks after blooming has finished. You can cut the foliage down to about 4 inches or use the dried leaves as a handle to help pull them from the ground. Gently loosen the soil around the base and lift the corms. You’ll likely find a new, healthy corm on top of the shriveled old one from the previous season. You may also see tiny cormels attached; these can be saved and planted to produce new plants in a few years.
Gladiolus Care Summary
- When to Dig: In the fall, after the foliage has yellowed and dried.
- How to Dig: Cut stems to 4 inches and carefully lift the corms.
- Storage Prep: Separate the new corm from the old one, remove soil, and let it cure for one to two weeks in a warm, dry spot.
3. Canna Lilies (Canna indica)
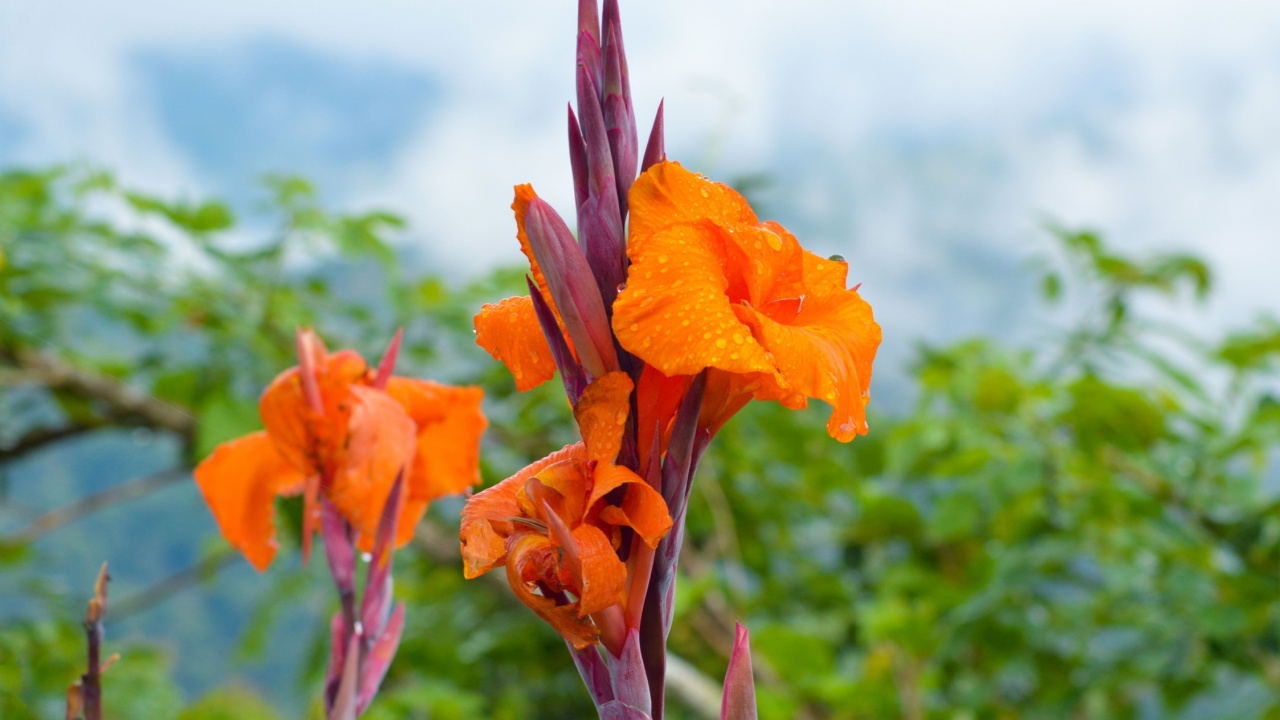
Image Credit: Shutterstock.
With their lush, tropical leaves and vibrant, exotic flowers, canna lilies bring a touch of the jungle to any garden. These plants grow from rhizomes and are native to tropical and subtropical regions, so they are not cold-hardy below USDA zone 8. Freezing temperatures will turn their fleshy rhizomes to mush.
After the first frost has caused the foliage to wilt and die back, cut the stems down to about 6 inches. Use a shovel or garden fork to dig widely around the base of the plant, as the rhizomes can spread to form a large clump. Lift the entire mass out of the ground. It’s best to store the clump whole with the soil still attached, as this helps insulate the rhizomes and prevent them from drying out too much.
Canna Lily Care Summary
- When to Dig: After the first frost has killed the foliage.
- How to Dig: Cut stems to 6 inches and lift the entire rhizome clump.
- Storage Prep: Keep the clump intact with soil attached and store in a cool, dry place.
4. Tuberous Begonias (Begonia x tuberhybrida)
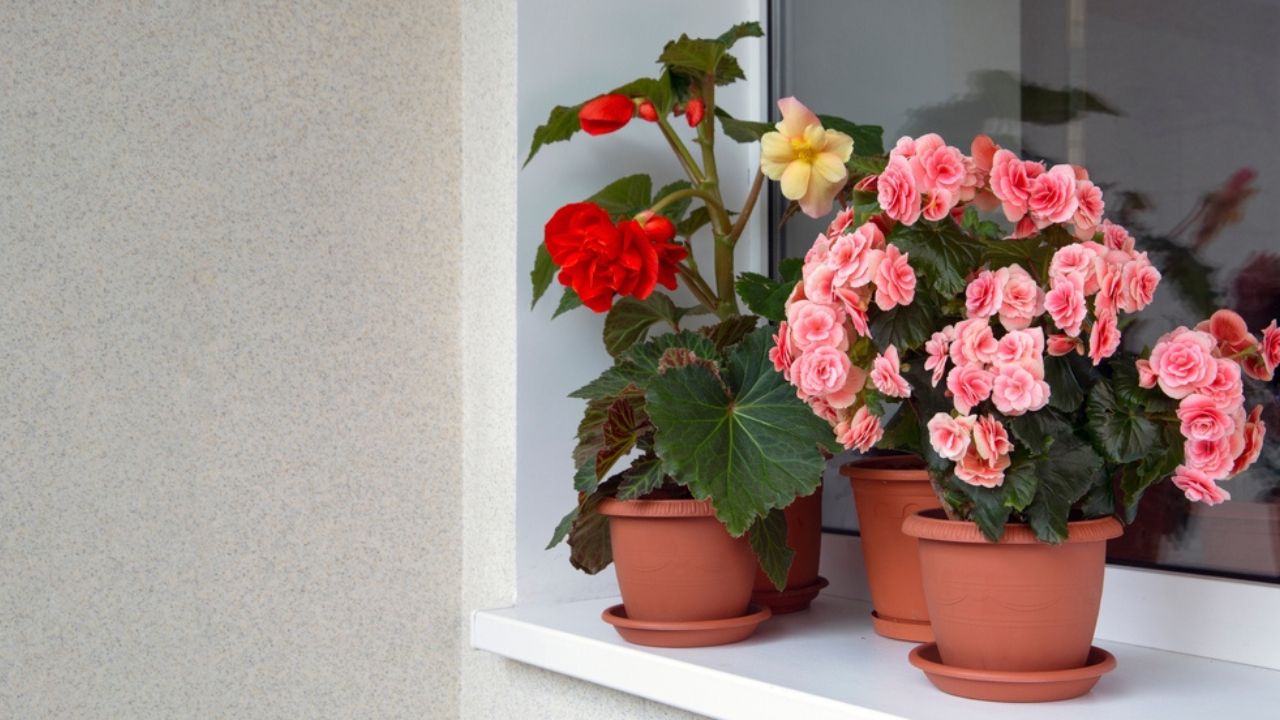
Image Credit: Shutterstock.
Tuberous begonias offer continuous, vibrant blooms in shady spots from summer until the first frost. Their beautiful flowers and often colorful foliage make them a favorite for containers and hanging baskets. However, these plants are very tender and will not survive winters in zones colder than 9. Their tubers are sensitive to both cold and excessive moisture.
Digging them up is essential for their survival. Wait until the foliage begins to yellow in the fall, or just after the first light frost. Cut the stems back to about an inch from the tuber. Carefully dig up the tubers, handling them gently to avoid bruising. Clean off any remaining soil and allow them to cure in a dry, shaded, and well-ventilated area for about a week. Once cured, the remaining stem piece should easily break away.
Tuberous Begonia Care Summary
- When to Dig: When foliage yellows in late fall or after the first light frost.
- How to Dig: Cut stems back to one inch, then carefully lift the tubers.
- Storage Prep: Gently clean off soil and cure in a dry, airy location for about a week.
5. Elephant Ears (Colocasia and Alocasia spp.)
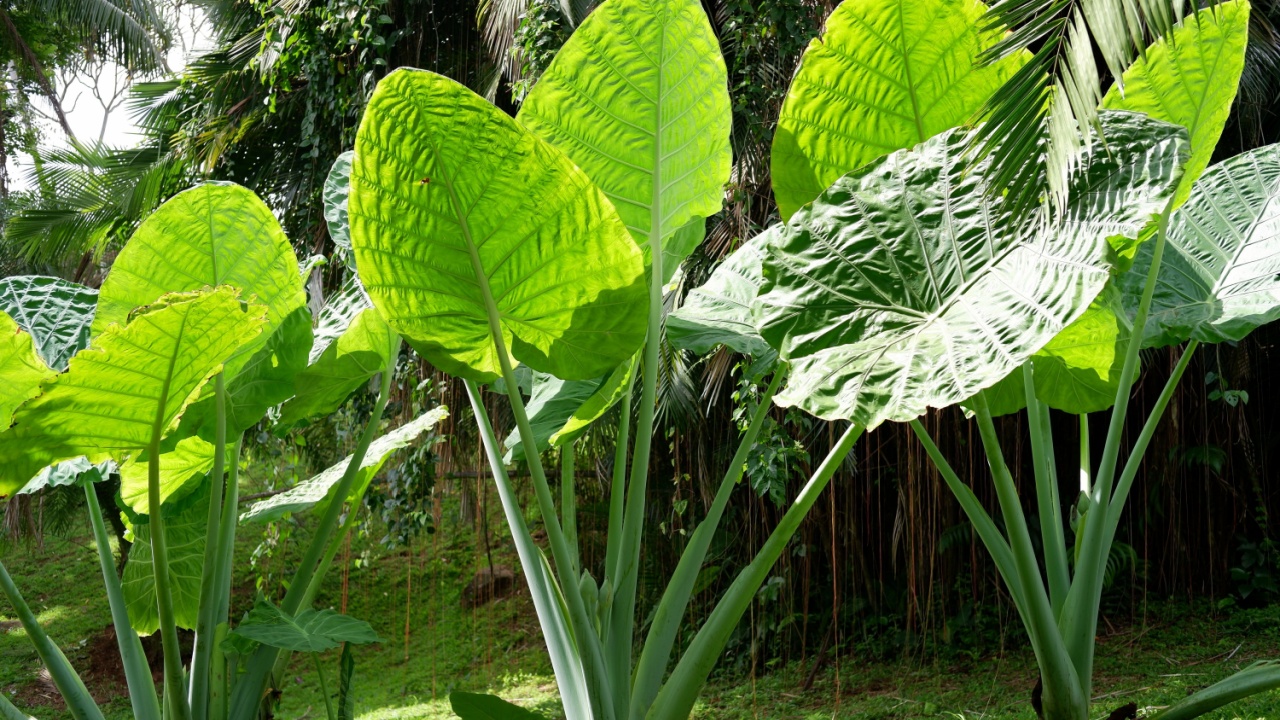
Image Credit: Shutterstock.com.
Elephant ears are grown for their dramatic, oversized leaves that create an instant tropical feel. These plants grow from large tubers and are only hardy in zones 9 or 10 and above. In colder climates, the tubers must be lifted and stored to protect them from freezing.
Wait until the first frost has damaged the leaves. Cut the foliage back to a few inches above the ground. Use a shovel to carefully dig around the tuber, giving it plenty of space. Lift it from the soil and brush off excess dirt. Allow the tuber to dry for a week or two in a warm, airy location before storing it for the winter.
Elephant Ear Care Summary
- When to Dig: After the first frost has damaged the foliage.
- How to Dig: Cut leaves back to a few inches, then carefully dig up the tuber.
- Storage Prep: Clean off soil and allow the tuber to dry in a warm, airy spot for 1-2 weeks.
6. Caladium (Caladium spp.)
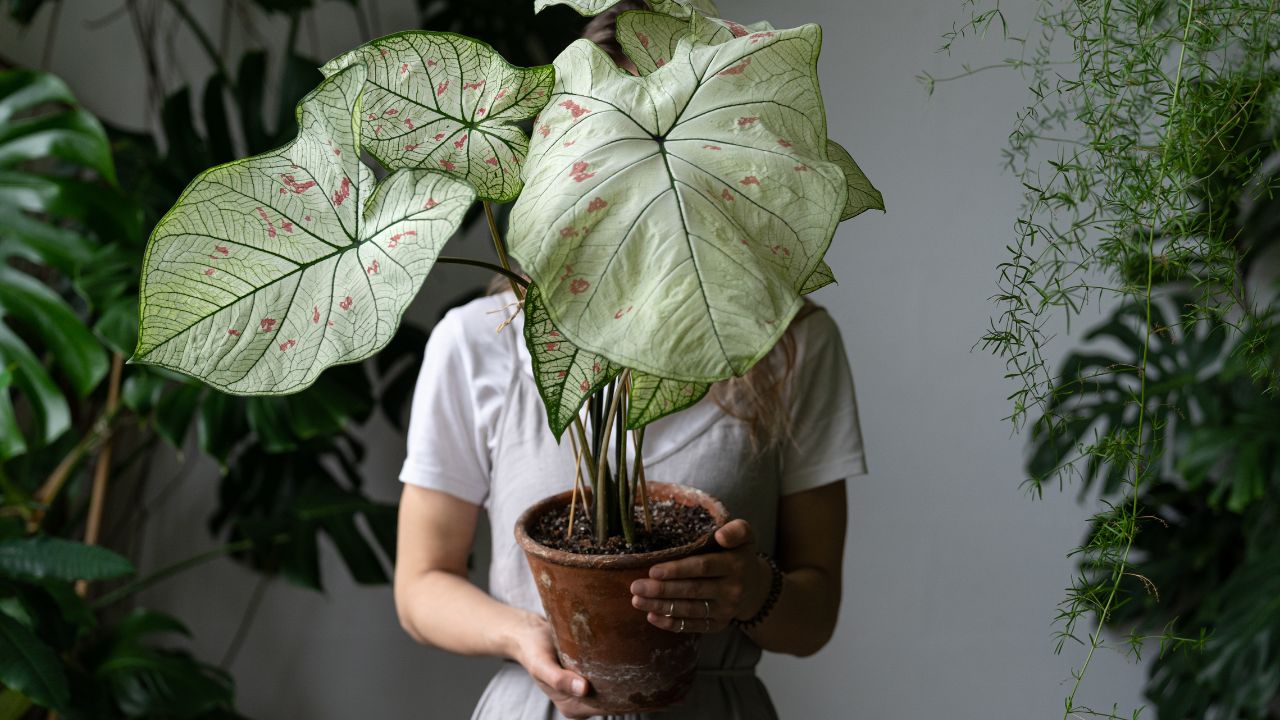
Image Credit: Shutterstock.
Also known as Angel’s Ears, caladiums are prized for their stunning, heart-shaped leaves that come in shades of pink, white, red, and green. They thrive in heat and humidity but are extremely sensitive to cold, surviving the winter outdoors only in zones 9 and above. Their tubers will quickly rot if left in cold, wet soil.
As temperatures drop in the fall, the leaves will begin to yellow and droop. This is your cue to dig them up. You can lift them while the leaves are still attached or cut the foliage back first. Use a trowel or your hands to gently unearth the tubers. Brush off the soil and let them cure for about a week in a warm, dry place until the paper-like sheath is dry to the touch.
Caladium Care Summary
- When to Dig: When the leaves start to yellow and droop in the fall.
- How to Dig: Gently lift the tubers with a trowel or by hand.
- Storage Prep: Clean off soil and cure in a warm, dry location for about a week.
7. Crocosmia (Crocosmia spp.)
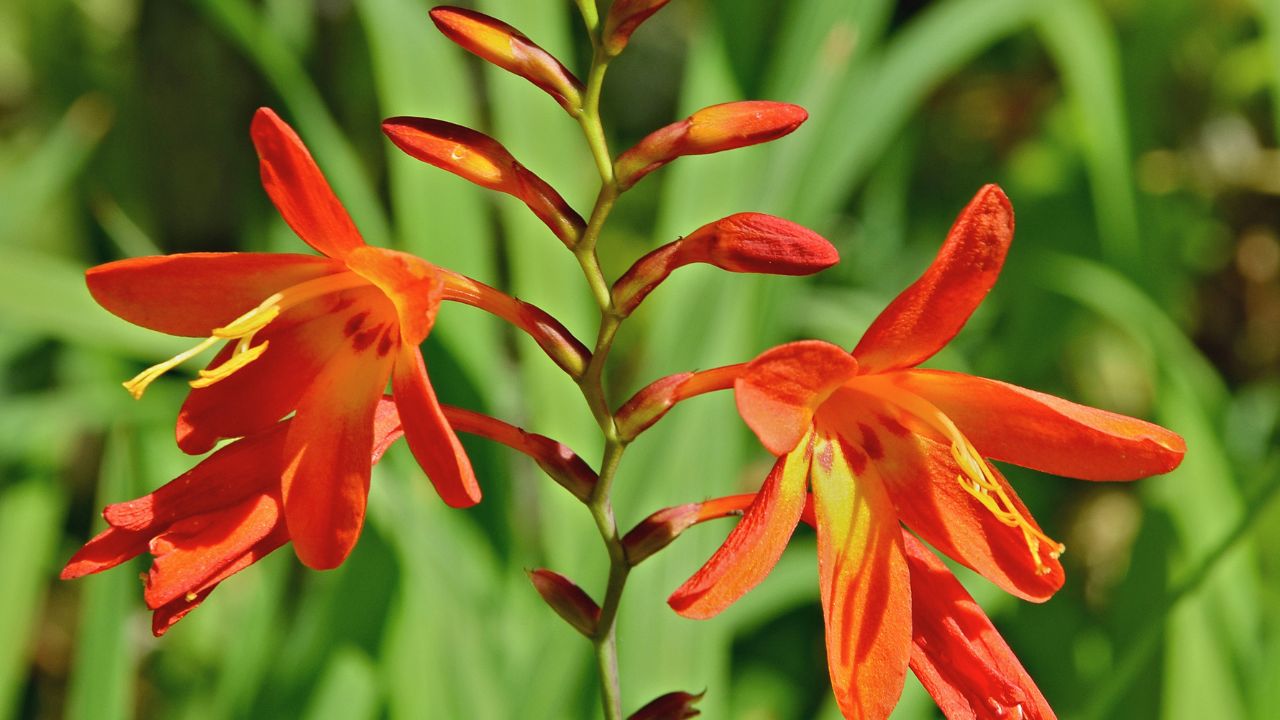
Image Credit: JLPC / Wikimedia Commons, CC BY-SA 3.0/Wiki Commons.
With their fiery-colored, arching sprays of flowers, crocosmia adds a vibrant and structural element to the garden in late summer. While some varieties are hardy to zone 6, many are more tender. Even in warmer zones, they dislike wet winter soil, which can cause the corms to rot. Lifting them is a good practice to ensure their survival, especially in regions with heavy winter rain.
Wait until the foliage has completely died back after a frost. Cut the stems down to a few inches. Use the remaining stems as a handle to gently pull the corms from the ground, using a fork to loosen the soil if needed. You will find a chain of corms; separate them, discarding any old, shriveled ones from the bottom.
Crocosmia Care Summary
- When to Dig: After a frost has killed the foliage.
- How to Dig: Cut stems and use a fork to lift the chain of corms.
- Storage Prep: Separate the corms and allow them to cure for a few days before storing.
8. Freesias (Freesia spp.)
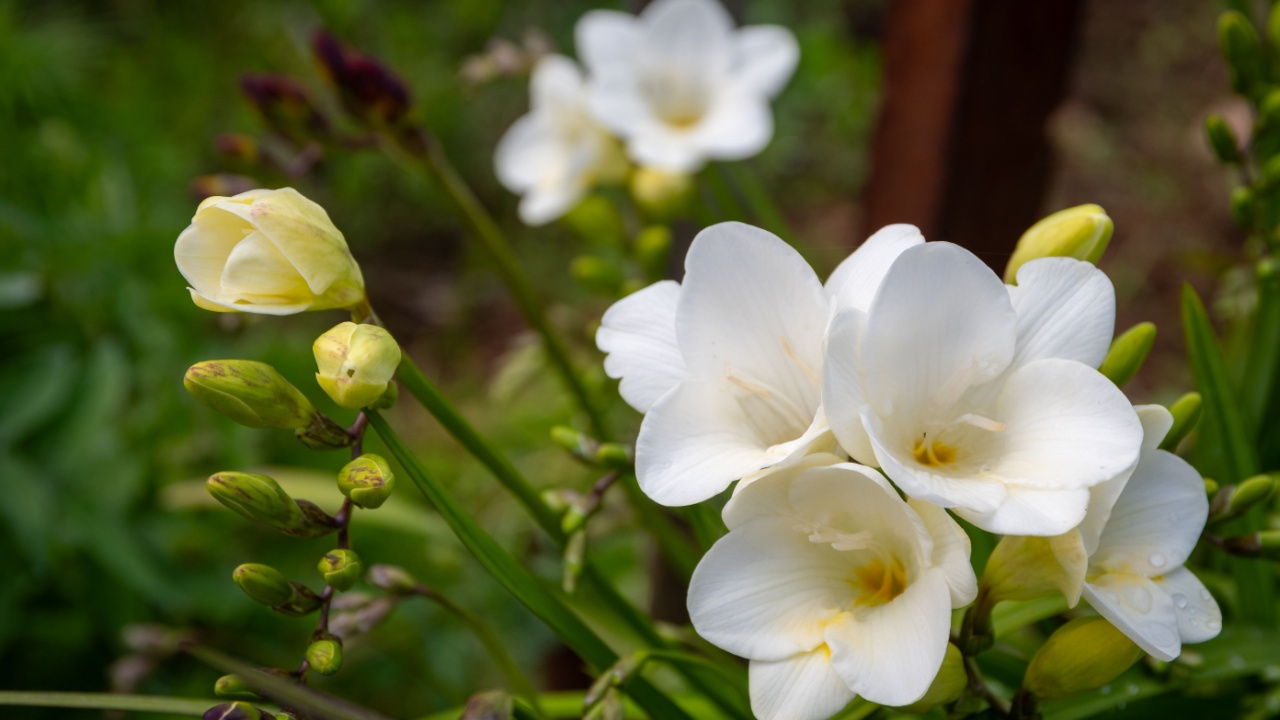
Image Credit: Shutterstock.com.
Freesias are beloved for their intensely fragrant, colorful flowers. They are typically grown as summer-blooming bulbs in colder climates and are only hardy in zones 9-10. If you live in a cooler region and planted them in the spring for summer blooms, you must dig up the corms in the fall.
Once the foliage has yellowed and dried completely, it’s time to lift the corms. Cut the foliage back to an inch or two. The corms are small, so dig carefully with a hand trowel to locate and lift them. Brush off the soil and allow them to dry in a well-ventilated area for a few days.
Freesia Care Summary
- When to Dig: After the foliage has yellowed and died back completely.
- How to Dig: Cut back foliage and use a hand trowel to carefully lift the small corms.
- Storage Prep: Clean off soil and let the corms air-dry for several days.
9. Ranunculus (Ranunculus asiaticus)
Image Credit: Shutterstock.
Persian Buttercups are known for their exquisite, rose-like flowers with paper-thin petals. In zones 8 and warmer, they are often planted in the fall for spring blooms. In colder climates (zone 7 and below), they are planted in the spring for summer flowers. These summer-blooming plants will not survive a cold winter in the ground. Their tuberous roots, which look like small claws, are prone to rot.
After the plant has finished blooming and the foliage begins to yellow and die back, stop watering. Once the foliage is completely brown, dig up the claw-like tubers. Gently clean off the soil and allow them to dry thoroughly in a shaded, airy spot for several days before storing.
Ranunculus Care Summary
- When to Dig: Once the foliage has completely yellowed and dried.
- How to Dig: Carefully lift the small, claw-like tubers from the soil.
- Storage Prep: Clean and dry them thoroughly before storing.
10. Tiger Flower (Tigridia pavonia)
Image Credit: Shutterstock.com.
Tiger flowers are exotic and eye-catching, with triangular flowers that are spotted in the center. Each stunning flower lasts only a day, but the plant produces them for several weeks. Native to Mexico, they are tender and only hardy in zones 8-10. Their bulbs will not survive freezing temperatures.
Wait until the foliage dies back in the fall, which is often prompted by the first frost. Cut the stems down and carefully dig up the bulbs. You may find that the plant has produced several small bulblets around the main bulb. These can be saved to grow more plants. Clean the bulbs and let them air dry for a week.
Tiger Flower Care Summary
- When to Dig: When the foliage has died back in the fall.
- How to Dig: Cut back the stems and carefully lift the bulbs and any attached bulblets.
- Storage Prep: Clean and air-dry the bulbs for about a week.
11. Eucomis (Eucomis comosa)
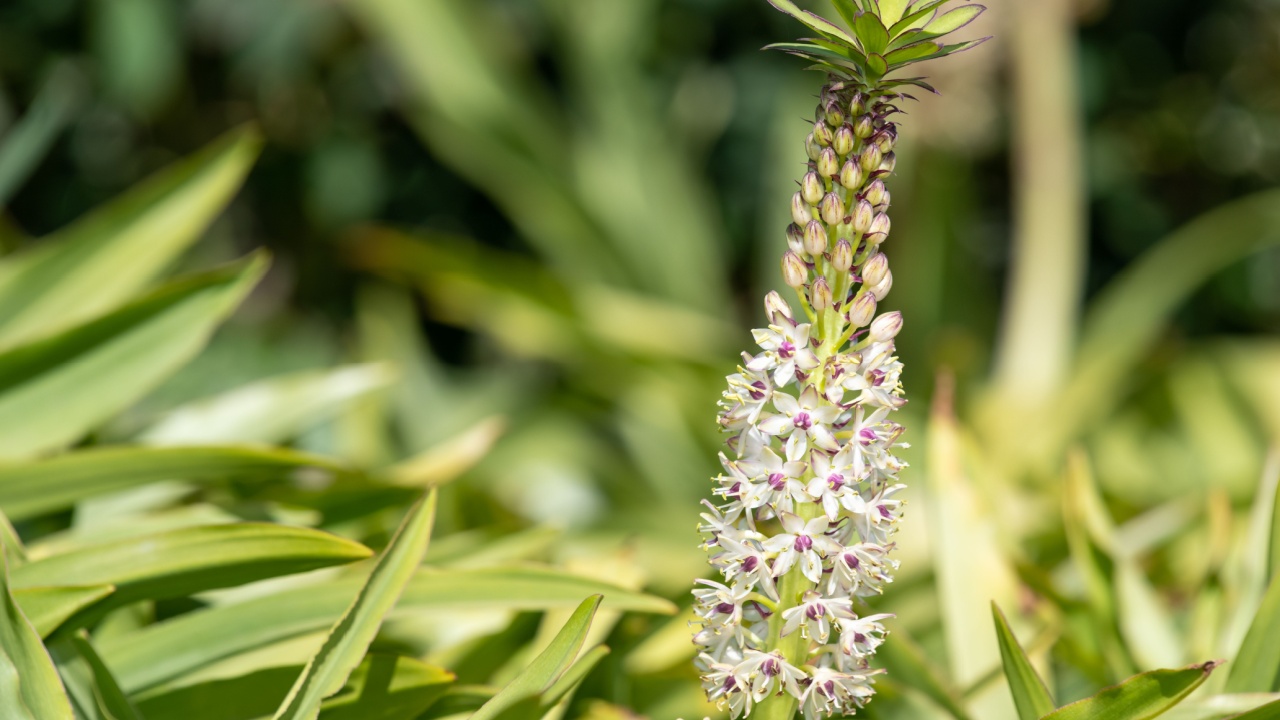
Image Credit: Shutterstock.com.
Commonly known as the Pineapple Lily, Eucomis is a unique plant with tall flower spikes topped with a tuft of green bracts, resembling a pineapple. It is a striking addition to containers and borders. While some are hardy to zone 7 with protection, most are tender and best lifted in colder climates to protect the bulbs from freezing and rot.
In the fall, after the foliage begins to yellow, you can dig up the bulbs. Use a garden fork to lift them carefully. Clean the soil from the bulbs and roots. Allow them to cure in a warm, dry place with good air circulation for a week or two before storing them.
Eucomis Care Summary
- When to Dig: In the fall, when the foliage starts to yellow.
- How to Dig: Use a garden fork to carefully lift the bulbs.
- Storage Prep: Clean the bulbs and allow them to cure for 1-2 weeks in a dry, warm location.
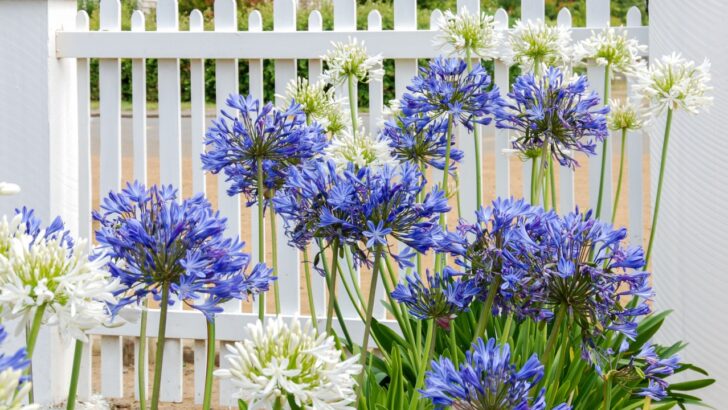
12. Lily of the Nile (Agapanthus spp.)
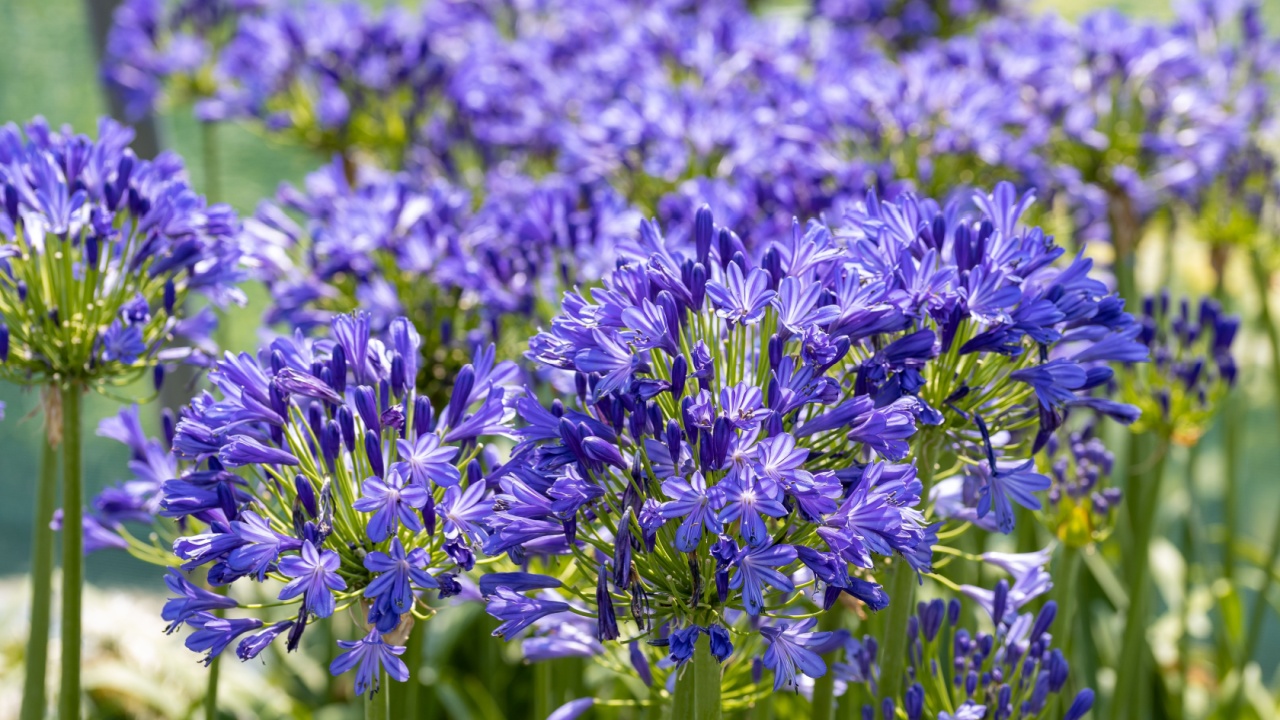
Image Credit: Shutterstock.
Agapanthus produces glorious globes of blue or white flowers on tall, stately stems. While some deciduous varieties are hardy to zone 6, the evergreen types are much more tender. For gardeners in zones 7 and below, it is safest to dig up the fleshy rhizomes or bring potted plants indoors.
After the foliage dies back in the fall, cut it down to a few inches. Carefully dig around the plant and lift the entire clump of rhizomes. It is best to keep the clump mostly intact. Brush off the loose soil, but leave the roots attached. Store the clump in a container, covering it lightly with peat moss or sawdust.
Lily of the Nile Care Summary
- When to Dig: When foliage dies back in the fall.
- How to Dig: Cut back foliage and lift the entire rhizome clump.
- Storage Prep: Keep the clump intact and cover it with a dry medium like peat moss.
13. Jersey Lily (Amaryllis belladonna)

Image Credit: Shutterstock.com.
Not to be confused with the common indoor holiday amaryllis (Hippeastrum), the true Jersey Lily is a magnificent fall-blooming bulb from South Africa. It produces large, fragrant pink flowers on naked stems. It is only hardy in zones 8 and above. The massive bulbs are planted with their necks just above the soil, making them very vulnerable to frost.
After the foliage has completely died back in late summer or early fall, it’s time to act. Because the bulbs are so close to the surface, they are easy to lift. Cut back any remaining leaves. Use your hands or a small trowel to gently dig around the bulb and lift it out. Clean it, let it dry, and store it for the winter.
Jersey Lily Care Summary
- When to Dig: After the foliage has died back completely.
- How to Dig: Gently lift the large, surface-planted bulb.
- Storage Prep: Clean and dry the bulb before storing.
14. Spider Lilies (Hymenocallis spp.)

Image Credit: Shutterstock.com.
Spider Lilies produce fascinating and fragrant white flowers with long, spindly petals that resemble a spider’s legs. These subtropical natives are only hardy to about zone 8 and make excellent candidates for lifting in the fall in colder climates. Their bulbs will rot in cold, wet winter soil.
Wait until the foliage has yellowed and begun to die back in the fall. Cut the leaves back to 2-3 inches. Use a garden fork to loosen the soil around the bulbs and lift them carefully. Gently clean off the excess soil and allow the bulbs to cure for a few days in a dry, shady spot before you put them into storage.
Spider Lily Care Summary
- When to Dig: After the foliage yellows and dies back in autumn.
- How to Dig: Cut back leaves and use a fork to carefully lift the bulbs.
- Storage Prep: Clean off soil and cure for several days in a dry, shady area.
Planning Ahead for a Beautiful Spring Garden

Image Credit: Shutterstock.
Now that you’ve successfully lifted your tender bulbs, the final step is proper storage. Place your cured bulbs, corms, or tubers in a breathable container like a cardboard box, paper bag, or mesh sack. Fill the container with a dry medium like peat moss, sawdust, or vermiculite to help maintain steady humidity and prevent them from touching.
Store the container in a cool, dark, and dry place where temperatures remain consistently between 40-50°F (4-10°C). An unheated basement, garage, or cellar is often perfect. Check on your bulbs every month or so to ensure they are not shriveling or showing signs of mold. With this simple fall chore completed, you can rest easy knowing your garden’s most prized beauties are safe, sound, and ready to dazzle you again next spring.
